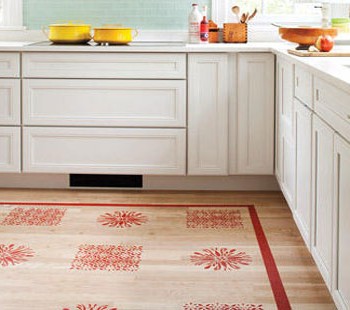
Stencils have been used in decoration for hundreds of years and by many cultures. Here is a simple, cost-efficient technique for achieving an even and regular pattern.
This stencil was taken from an ancient Greek key pattern. It was made up from thick opal acetate that was easy to see through and match up with the second part of this two-part design. Suitable alternatives are manila card (a special oiled stencil card) and any thin card you could prepare yourself with a coat of varnish. Paper can be used for speed for very small areas, but will not last very long.
You could make up your own stencil design, or copy and adapt a pattern you have seen, or even use photocopies of existing designs enlarged or reduced to fit your own floor.

If you are new to stencilling, it may be best to stencil onto a non-porous basecoat such as acrylic eggshell as this will enable you to wipe off any mistakes or leaks. If your basecoat is porous, such as a colorwashed floor, you could varnish this first before stencilling. Because of the distressed look to this particular stencil design, I have not worried too much about paint adhesion as more wear and tear actually adds to the effect.
Ready-made stencils can now be bought at many DIY stores. This saves time, but limits your subject matter and the scale of the design and will, of course, considerably detract from the enjoyment of making up your very own and unique floor border!
The night before starting this project paint the floor with a basecoat of acrylic floor paint; two coats will probably be required.
Day One
- Using chalk, mark out on the floor where you would like the border to run, and how large you would like the pattern to be. Start from the corners and measure out the length of the floor, making sure the pattern will fit approximately along this area. Small discrepancies can be improved later with a link piece (see Step 12).
- Draw out your design on graph paper. (Or, alternatively, prepare a photocopy.)
- Lay a sheet of thick opal acetate over the design and trace it onto this with a pencil.
- Use a craft knife. Cut out one side of the key design only and the outer corner squares and central square of the checked section.
- For the remaining squares on the check make up a separate stencil, but leave a tiny link joining the centre square to the corner ones.
- Apply beeswax cream here and thereto the floor where the stencil is to be applied and leave this to dry. This is to help distress the stencil later and will be chipped off once the stencil has been painted on over it and has dried. Apply this unevenly and with lumps so that the effect will look as natural as possible.
- It is possible to position the stencil with tape. I used spray adhesive as it fixes the stencil more evenly and can be stuck down and lifted off a number of times before having to reapply the adhesive.
- Prepare the acrylic colors you are going to use (I used a piece of painted hardboard as a palette). Dab the brush onto the paint and then onto a board or a cloth to remove excess paint from the brush.
- Starting from the corner, stencil on the first part of the key shape and the checked pattern.
Day Two
- Once the paint is completely dry, turn the stencil around, and stencil on the second part of the pattern – that is, the reversed key pattern.
- Use the separate stencil to stencil on the second gold color of the checked square.
- If the stencil does not fit exactly along the length of the floor, a link piece can be cut to solve this. Measure the gap and work out the link piece accordingly.
- Paint in any details by hand, marking them out with chalk first as a guideline.
- Once the paint is dry, gently chip off the beeswax with a filling knife or a paint scraper.
- Sand with a fine finishing paper to give a worn, distressed look. As this is a distressed pattern and has been painted on a tough acrylic floor paint, I chose not to varnish it but to leave it to distress further. If it starts to wear away too much it can be sealed then.