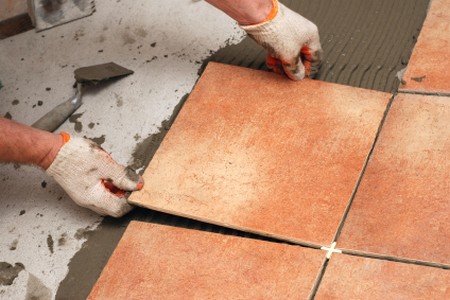
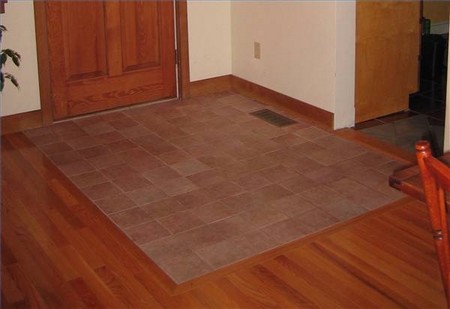
The way in which you lay ‘hard’ floor tiles (mainly ceramic, quarry and terracotta tiles) is slightly different from the method used in laying ‘soft’ floor tiles; you need to leave a gap between the tiles and a different adhesive is used. Cutting the tiles will also be much more difficult Terracotta tiles are laid in the same way as quarry tiles.
The floor itself will need to be reasonably level if it is solid. Once concrete polishing has taken place and the smooth surface is revealed installing any flooring option is easy. Floor levelling compound can be used with ceramic tiles, but need not be used for quarry tiles – the thick cement-based adhesive will allow for some discrepancy. Suspended timber floors will need to be strengthened with 12 mm exterior-grade plywood or the floorboards can be removed and replaced with chipboard (particle board) sheet. In either case, remember to leave inspection hatches if required.

FITTING THE TILES
The tiles should be set out – that is, first find the centre of the room and then work out how wide the edge tiles will be, adjusting the position of the centre tile so that you get equal edges. The edge tiles should be at least half a tile’s width.
Ceramic tiles and machine-made quarry tiles can be laid on a bed of adhesive as recommended by the manufacturers (a cement-based adhesive for quarry tiles). If the ceramic tiles do not have spacer lugs, you can buy special plastic spacers – or, if you want to make a feature of the grouting lines, improvise some wider spacers from, say, short lengths of 6 mm (1/4 in) dowelling rod. For quarry tiles, use short lengths of 6 mm timber to produce the grouting gaps.
When you have worked out the spacing of the tiles, secure a timber batten (furring strip) across the centre of the room and use this as a guide for laying the tiles. Lay around one square metre (10 square feet) of adhesive at a time and press the tiles into place, with the correct gaps between them. Check that the lines of tiles are straight and that the gaps between them are continuous. Lay all the whole tiles like this on half the floor, remove the batten and then tile the other half of the floor. Allow 24 hours for the adhesive to set before cutting and fitting the edge tiles – note that you should not walk on the tiles during this time, so if the room is one in constant use (such as a kitchen or bathroom) tile one half of the room one day, and the other half the next day. Finish off by using the recommended grout.
Hand-made quarry tiles vary in thickness and normally need to be laid on a ‘slurry’ of neat cement and water on top of a level sand and cement screed. Press the tiles down into the slurry using spacer strips 6 mm wide, checking regularly with a straight-edge that the tiles are all flat. If any tiles are above the level, tamp them down with a block of wood; if any are below the level, lever them oufand add more cement slurry.
Continue like this until all the whole tiles are laid and then leave for at least 12 hours for the mortar to set. Then cut and fit the edge tiles.
CUTTING’HARD’TILES
To measure up for ‘hard’ edge tiles, simply use a steel tape measure to find the distance between the last whole tile and the wall (measure both sides as the gap may taper) and transfer the measurements to the tile, allowing for the grouting gap.
Ceramic floor tiles and quarry tiles are thicker than ceramic wall tiles and so are more difficult to cut. You will certainly need a tile cutting machine to do the job (this can be hired); for cutting curves (to fit round a wash stand, say), a good tool to use is an angle grinder (which can also be hired) fitted with a masonry cutting disc.
To fit hard tiles around a pipe passing up through the floor, mark the position and size of the pipe on the tile, drill a hole slightly larger in the tile and then cut the tile in two, fitting one he If either side of the pipe.

FILLING THE GAPS
The gaps between ceramic floor tiles are filled with grout in the same way as ceramic wall tiles.
For quarry tiles, use the recommended grout or a dry mix of one part cement to one part sand to pack the bottom of the joint and then use a grouting mix of cement and water to finish off. Use a heavy-duty squeegee to push the base mix and the grouting mix into the joints. As this is drying, fashion it into a gentle concave shape with a short length of flexible rubber hosing. Finish off by polishing the joints with a damp sponge.