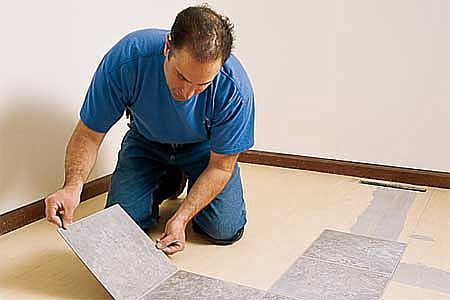
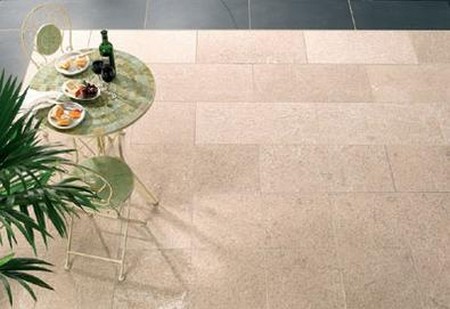
Vinyl, lino, cork, rubber and carpet tiles are all laid in the same way, the only difference being in the adhesive used – note that many tiles these days are self-adhesive and require only the removal of the backing paper to stick them down.
FITTING THE FIELD TILES
First of all the centre point must be established and the position of the first tile (the ‘key’ tile) determined. Place this down dry (or with the backing paper still attached) in the chosen position, checking that this is exactly in line with your chalk lines and that it looks right in the room. Now draw carefully around this and extend the lines beyond the edge of the tile (otherwise you will not be able to see the lines when you come to lay the tile).

Spread adhesive on the floor using the plastic spreader supplied with the tile adhesive (or remove the backing for a self-adhesive tile) and put one side of the tile down on the marked line, ‘rolling’ the rest of the tile down flat. If you get it wrong, pull it up again immediately and start again – unlike ceramic tile adhesive, there is no adjustment possible. Note that with rubber tiles the recommended adhesive is applied to both the tile and to the floor.
Now work outwards from this tile, laying one tile at a time. When spreading adhesive on the floor do not cover more than about a square metre (10 square feet) at a time. Make sure that each tile is put down in line and that it is butt-jointed closely to the next tile. If any adhesive squeezes up between the joints, remove it at once with a damp cloth or a cloth dampened with white (mineral) spirit (check the adhesive manufacturer’s instructions). Where the tiles have decorative markings, it is usual to lay them ‘cross-grained’ – that is, with the markings on adjacent tiles at right angles to each other.
Continue laying whole floor tiles until you get to the edges of the room, where the tiles need to be cut.
FITTING THE EDGE TILES
Around the edges of the room, you will have to cut each individual tile to the correct size.
The way to cut an edge tile accurately is to lay a whole tile exactly on top of the last whole tile to have been laid in a row and then place a third whole tile on top of it, so that it is lined up with the middle tile, but meets the wall along its edge. Now draw a pencil line along the opposite edge of the top tile. This is your cutting line.
Next take the middle tile and cut or break it along the line. The part of the middle tile furthest from the wall is the edge tile and it will fit the space exactly.
You can adapt the same procedure to use up a part tile (one that has already been cut). To do this, line up the uncut edge of the tile with the back edge of the bottom tile (that is, with the cut edge facing the wall) to mark the second cutting line.
At corners, you will have to repeat the procedure twice. So you do not get confused, write A on the floor against one wall and B against the other and then write A and B on the bottom side of the tile to show which way round it goes.
For tiles which have been laid diagonally, you must modify the procedure by making a rectangular hardboard template, the length of which is equal to the diagonal dimension of the tile (for a square tile, 1.414 times its length). This template is then placed against the wall with a whole tile placed on top of the next to last tile in each row.
To lay the edge tile, spread more adhesive (or remove the backing paper) and simply stick the tile down. It is probably easiest to do this one tile at a time as you go, since the tiles will usually vary slightly in size and you do not want to get them mixed up.
FITTING AROUND OBSTACLES
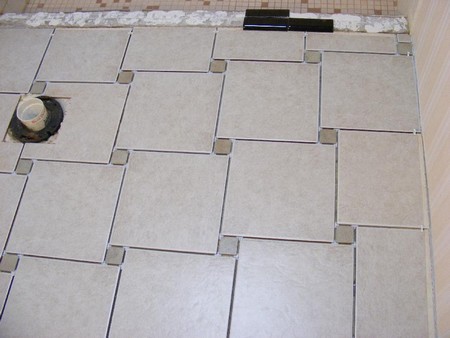
The four main ‘obstacles’ you are going to meet with floor tiles are square cupboards (or vanity units in bathrooms), curved pedestal basins and WC pans in bathrooms, doorways and pipes passing up through the floor.
A square cupboard is the easiest to negotiate and here you use the same technique as described opposite for cutting edge and corner tiles.

Curved obstacles are more difficult and the best method is to cut a paper template to the correct shape. Make the template slightly larger than a tile so you can mark on it where the two edges of the tile will come and fold the template back along these two edges. Fold or cut the template around the curved object (make inward cuts to help you do this) until you have reproduced the shape exactly (be prepared to have more than one go at this). Then place the template over the tile, lining it up with the edges, and draw your cutting line, which can then be cut with a trimming knife or scissors.
At doorways, hold the tile against the doorway from both sides and mark on the edges where the main lines of the door frame and architrave moulding will come on the tile. Then use a profile gauge to reproduce the exact shape of the moulding and transfer this to the tile. It is a good idea to try this out on a tile-sized piece of card first, so you can check the measurements are correct before cutting the tile. When you have got it right on the card, use the card as a template for marking and cutting the tile.
To fit ‘soft’ tiles around pipes coming up through the floor, cut the tile to the correct size (if it is an edge tile) and then hold it against the pipe on two sides, first parallel with the last whole tile and second against the wall, so that you can mark on the tile where the two edges of the pipe fall. Then using a try square, continue these lines across the tile until they meet and the square in the centre is exactly where the pipe will pass through. Mark the centre of this square and drill or cut out a circle slightly larger than the pipe. Make a single cut from the hole to the edge of the tile which will be against the wall and the tile can now be manoeuvred into place, passing the pipe through this cut and into its hole.
LAYING BORDER TILES
You can create a very interesting effect by laying some narrow patterned border tiles (vinyl or lino) with your main flooring tiles. They have the effect of ‘framing’ the main floor and can either be laid at the extreme edge or just inside the edge so that there are plain tiles both inside and outside the border and the corners of the border join up.
The diamond lino border tiles come in lengths which have been cut around one diamond so that they fit together. The two outer strips have been extended (to protect the points of the diamond), so need to be cut off before two strips can be laid together.
If the border tiles are to be laid at the edges, you lay these first followed by the main flooring; if they are to be laid away from the wall, you lay the main body of tiles first, then the border and finally the tiles between the border and the wall. You will need to position the border ‘dry’ exactly where you want it and then mark the inside edge with pencil (or strike a chalk line) to act as a guideline to which the main floor covering will be laid.

The border tiles themselves are laid in exactly the same way as normal floor tiles, the only exception being how they are joined at the corners. Here, you will need to remove a small amount of the covering strip and cut carefully around the pattern to give a neat join. Do this ‘dry’ and then spread adhesive and lay the border tiles. Choose the most prominent corner to make the neatest join. Finish by peeling off the covering strip and rolling the whole floor (especially the border) with a 68 kg (150 lb) floor roller.