b2evolution is a blog publishing system that is based on PHP and utilizes MySQL database. B2evolution is licensed by GNU General Public License. b2evolution was originally developed by Francois Planque. The latest release of b2evolution is version 3.3.1. which was released on the 8th August 2009.
B2evolution can be easily installed on your website through Fantastico in Cpanel. B2evolution allows the users to maintain multiple blog through a single installation. The latest version of b2evolution includes spam filters, more languages supported, and a fully exposed API so that other developer can improve the blog system.
Many plugins have been developed to add new functionality to b2evolution. Plugins that have been developed for b2evolution include Textile, Auto-P, Greymatter and LaTeX.
It is very easy to post an entry in b2evolution blog. All you have to do is to type an entry and click on the post this button.
There are many features in b2evolution. Every blog entry will automatically be arranged by date. You can also customize a theme for your b2evolution blog. Visitors can also leave a comment in the comment box under your post. B2evolution allows to run the blog on your own domain. The i-e software let you have your own blog, RSS feeds and photos showcase.
If you want to install b2evolution through cPanel, follow the instructions below:
Procedure:
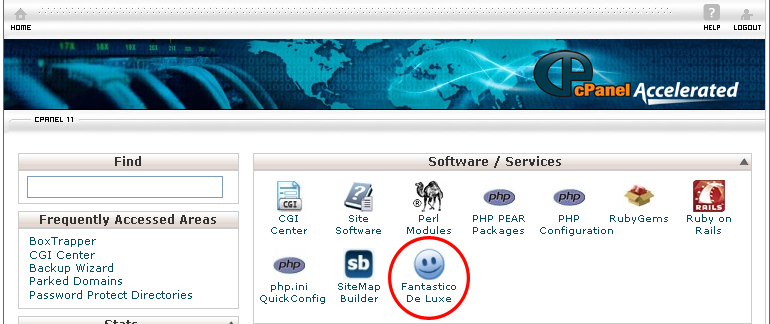
1. On the homepage of your cPanel, click on the Fantastico icon. This will take you to the home page of Fantastico.
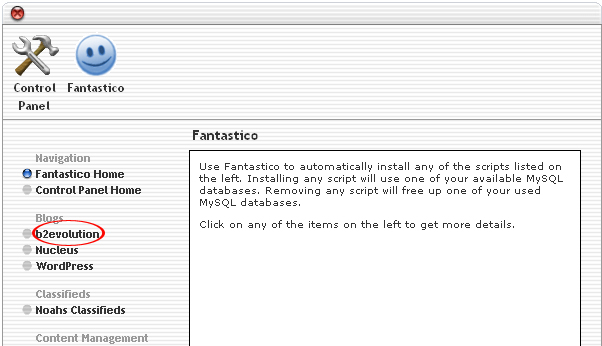
2. Click on b2evolution in the Blogs section on the left Navigation bar.
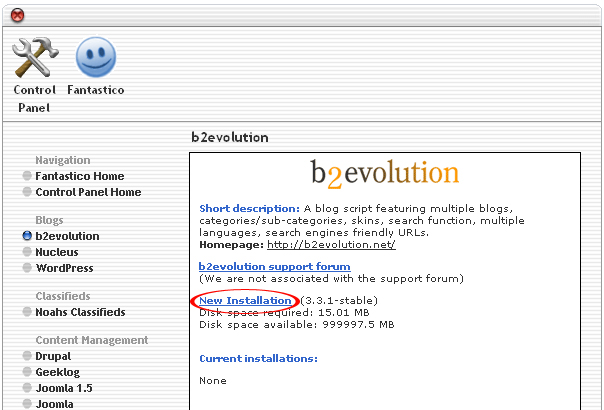
3. Click on New Installation.
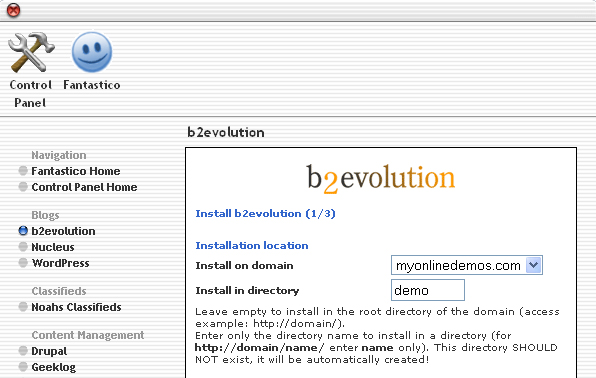
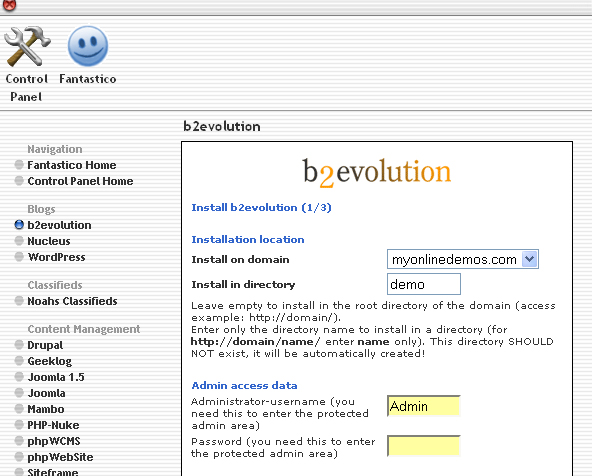
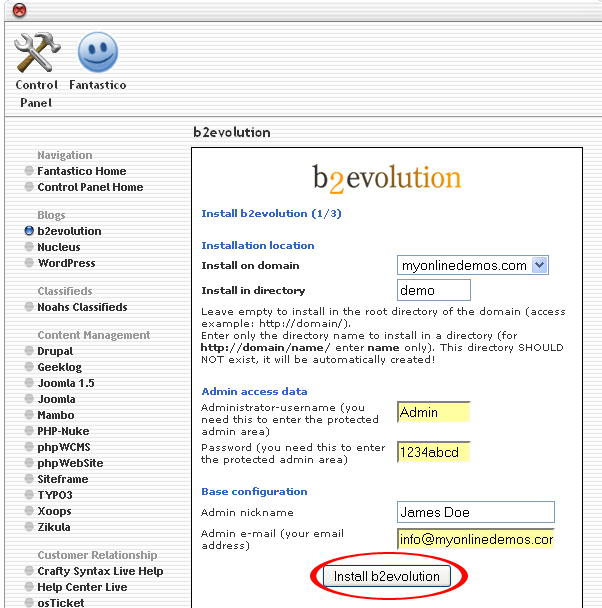
4. Select the domain on which you want to install b2evolution from the Install on domain drop down menu.
5. If you want to install b2evolution in the root directory of the domain, leave the Install in directory text box empty. If you want to install b2evolution in a directory, enter the directory name. This directory should not be existed. It will be automatically created.
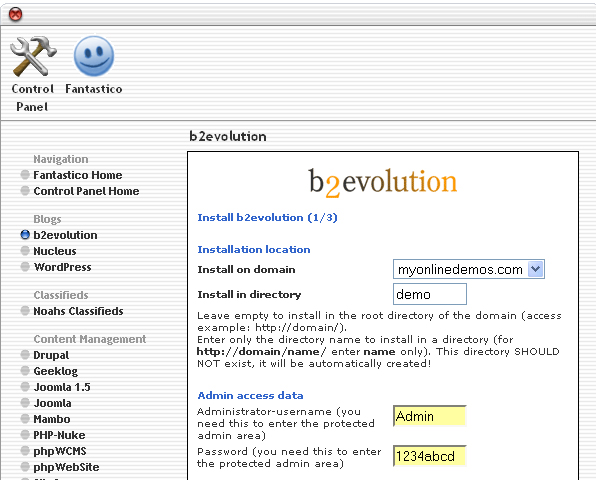
6. Enter a username in the Administrator-username text box. You need this to enter the b2evolution administration area.
7. Enter a password in the Password text box. You need this to enter the b2evolution administration area.
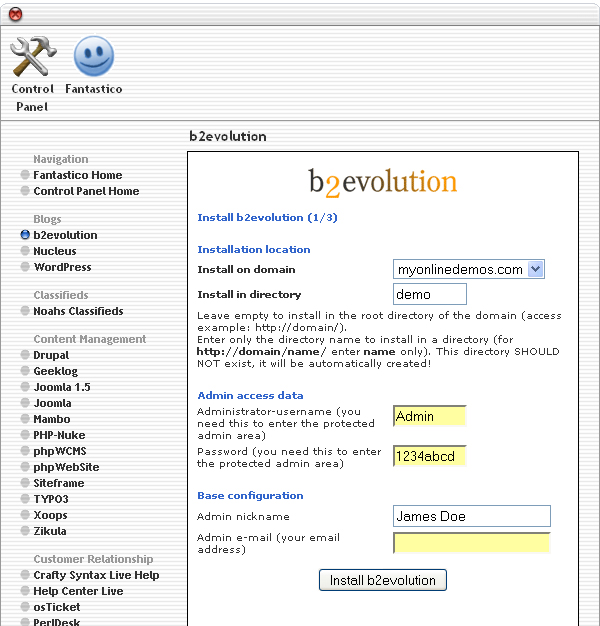
8. Enter a nickname in the Admin nickname text box. This nickname will appear in every post that you will publish on your b2evolution blog.
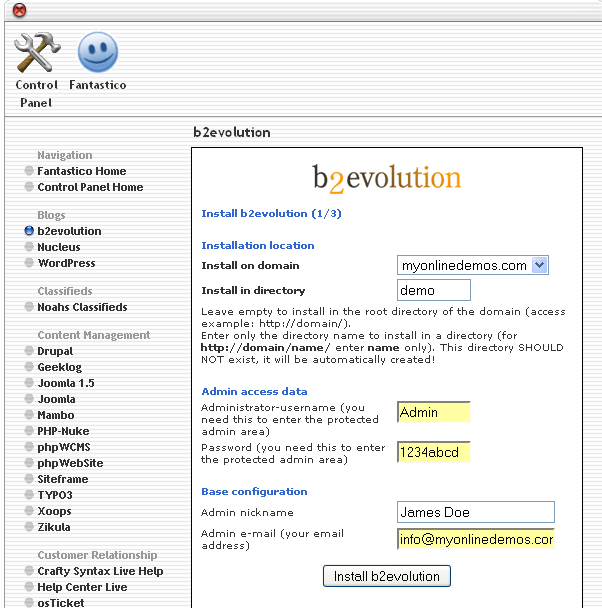
9. Enter an email address in the Admin e-mail text box. All b2evolution notifications will be sent to this email address.
10. When you are done, click the Install b2evolution button.
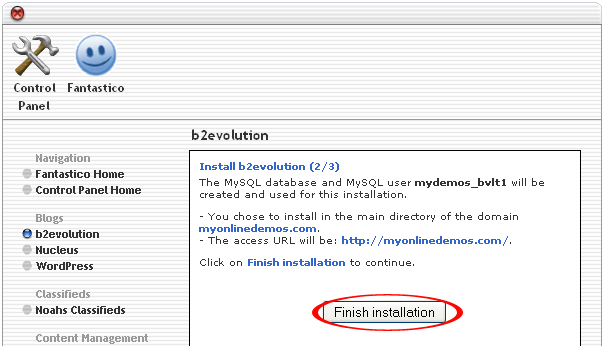
11. Click the Finish Installation button.
12. The b2evolution is successfully installed. You can now login to the b2evolution admin area and start posting.
By following the guidelines above, you will be able to install b2revolution on your site and start blogging immediately.
