The autoresponder is a program that is programmed to send a message automatically when someone sends an email to the specific email address. The first autoresponders that were created is the bounce message which indicates the email could not be delivered due to faulty email address.
Autoresponders are often used on an ecommerce website that is selling a product or service. It ensures that the customers’ emails are received and that it will be responded in a timely manner. It is also used by someone who is out of office or not available to respond to a message.
When a visitor first visits your shop, he/she will be unlikely to purchase your product. At first, they have not learned about the full features of your product. Most visitors will not order because they are evaluating other products and don’t have enough money to purchase it. Auto responders allow you to follow up with your website visitors and build credibility and trust on your product.
Visitors that are interested in your product will ask for some more information via email. The autoresponder will then immediately send the confirmation message to the prospective customers immediately. After that, you can follow up with them and build trust and rapport between you and your customers.
Auto responders give you some time to respond to any query. In the autoresponder, you can add any detail including the length of time that the customers are expecting to wait. Normally, the standard waiting time is 24 – 36 hours. Therefore, you will have sufficient time to review the questions of the customers and answer it promptly. You can include the type of business your company are involved and what type of customer your business is aimed at. You can also include phone numbers in the auto responder to build the trust of the customer.
If you want to create auto responders in Cpanel, follow the instructions below:
Procedure:
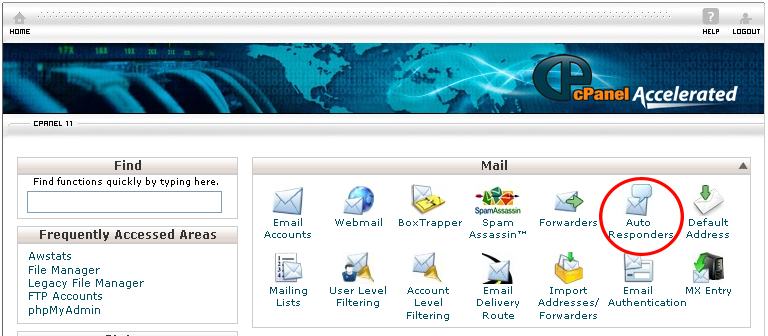
- On the homepage of your Cpanel account, click Auto Responders under Mail.
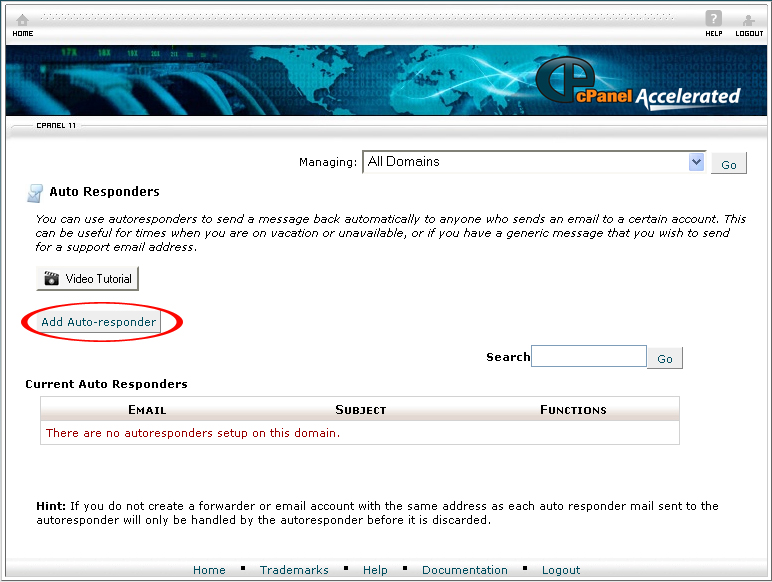
- Click Add Auto-responder.
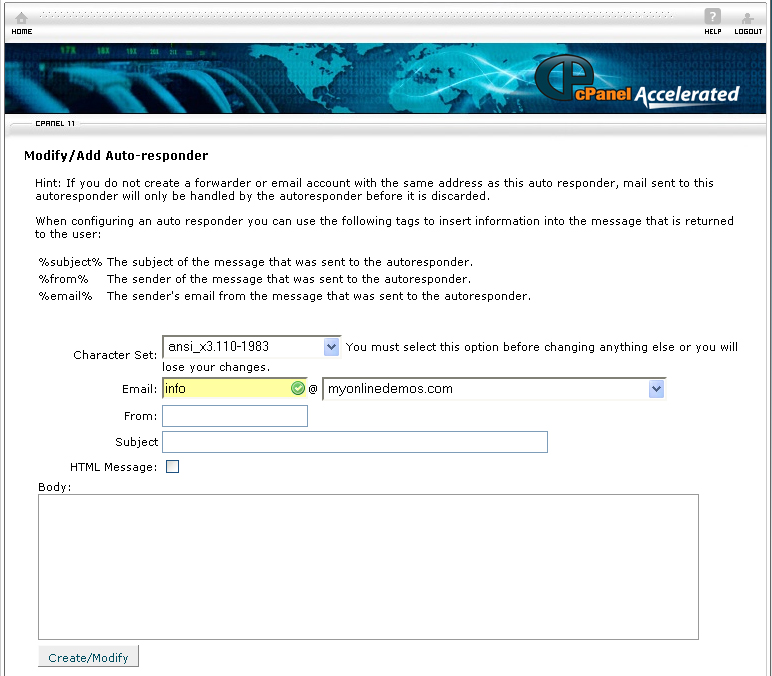
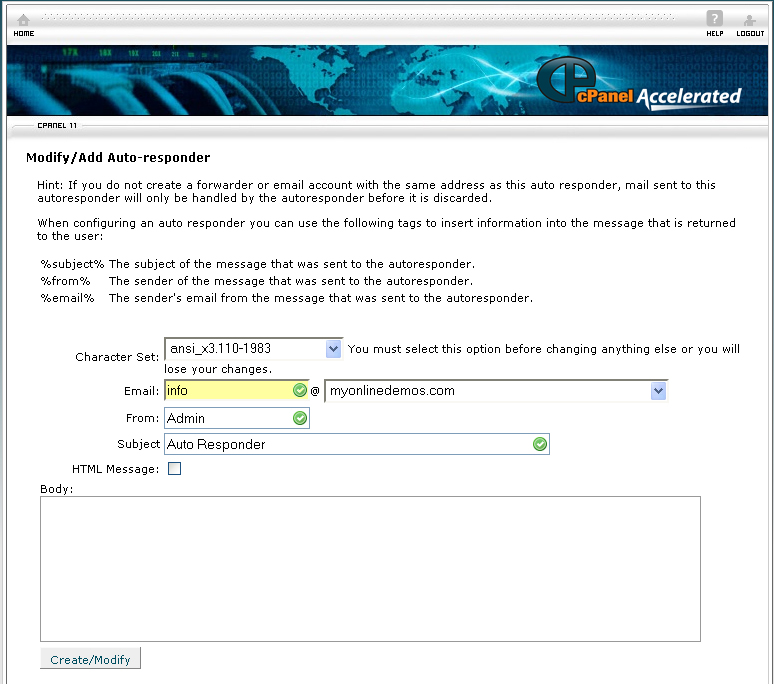
- Select the domain of the email account where email sent to this account will be automatically sent an auto responder.
- Enter the username of the email account where email sent to this account will be automatically sent an auto responder.
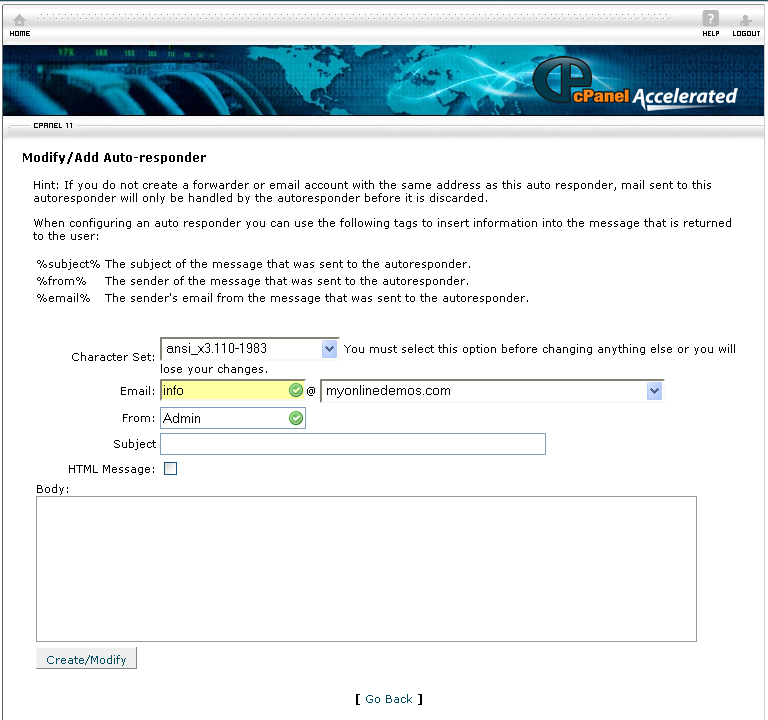
- Enter your name in the From text box.
- Enter the subject of the auto responder in the Subject text box.
- Check HTML Message if you want the message to appear in HTML template.
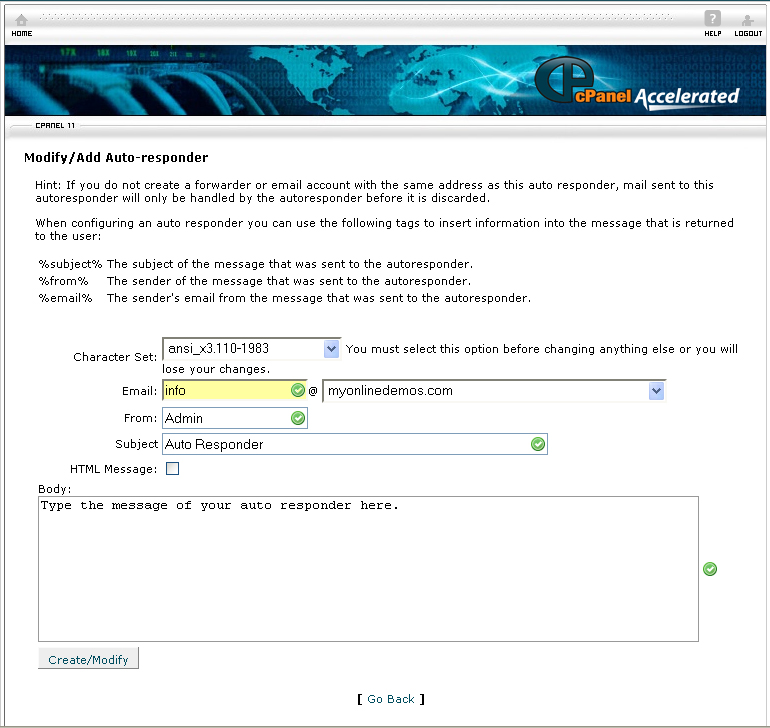
- Write the content for the auto responder in the Body text box.
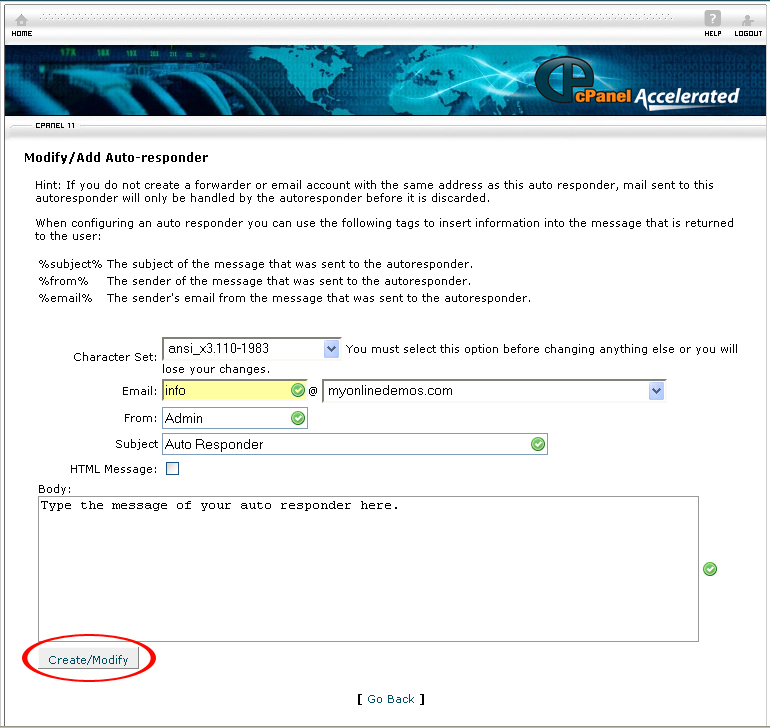
- After you are finished, click Create/Modify.
If you follow the above guidelines, you will be able to create an auto responder for your website through Cpanel.
