Secure Shell or SSH allows users to exchange information through a secure channel. It is used mostly on an operating system that is based on Linux and Unix. SSH was developed to replace other insecure remote shells. SSH uses a secure encryption to ensure that your data is safe over an insecure network.
SSH uses a public key to encrypt the remote computer. SSH is usually used to login to a remote machine to carry out commands. Some of the features that SSH supports include tunneling, forwarding TCP ports and X11 connections. The SSH client program is utilized to connect to an SSH daemon. The SSH client program and SSH daemon are available in operating system such as, Mac OS X, Linus, Open VMS and Solaris.
SSH was originally developed by a Finnish researcher called Tatu Ylonen at Helsinki Universy of Technology in 1995. The initial version of SSH is called SSH-1. SSH-1 was devekiped to replace TELNET and rsh protocols which did not provide secure encryption of the data. SSH-1 was first released as a freeware and many people start using it in a short time. At the end of 1995, there are already 20,000 users in 50 countries.
SSH Shell Access allows you to connect to your website with command line program. You can copy execute every Enter of function just like an FTP application by running command lines. SSH Shell Access allows you to copy files, delete files, changing file permissions and et cetera.
To access SSH/Shell Access, follow the instructions below:
Procedure:
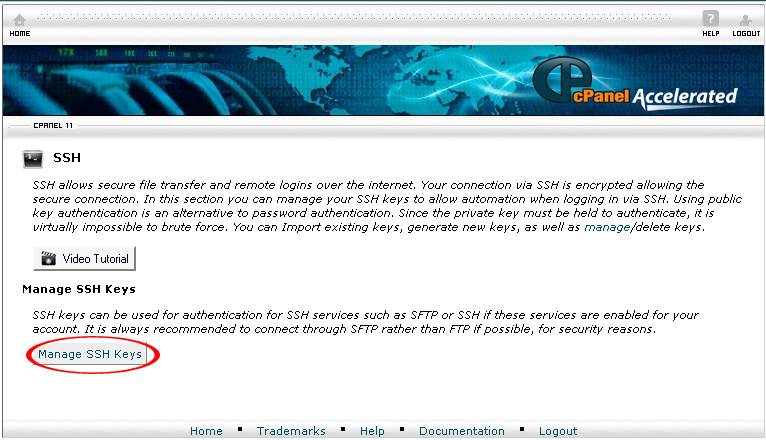
1. Click on the SSH/Shell Access icon under “Security”.
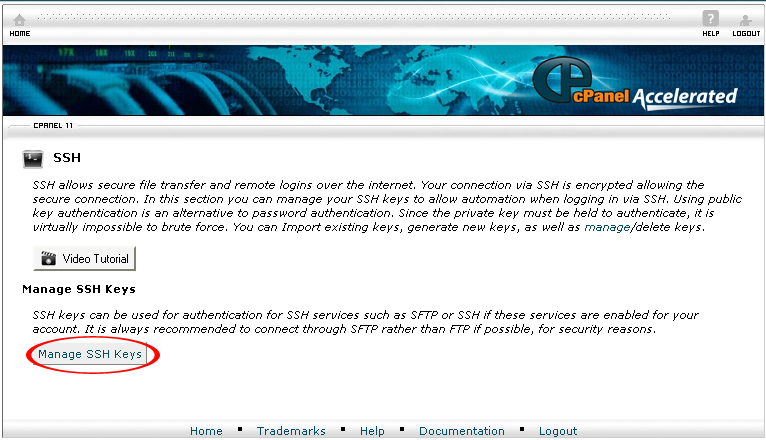
2. Click on the Manage SSH Keys button.
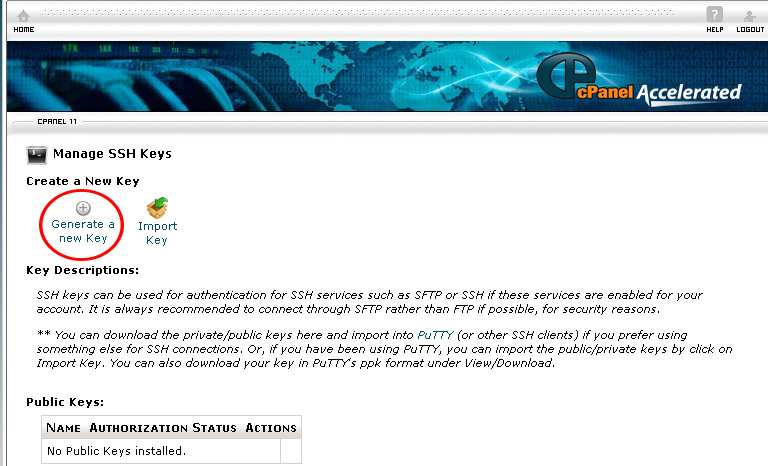
3. Click on Generate a new Key.
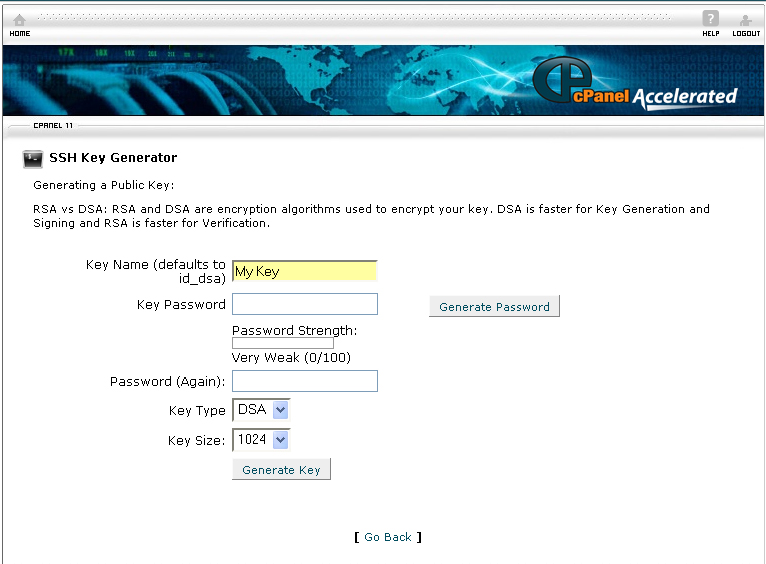
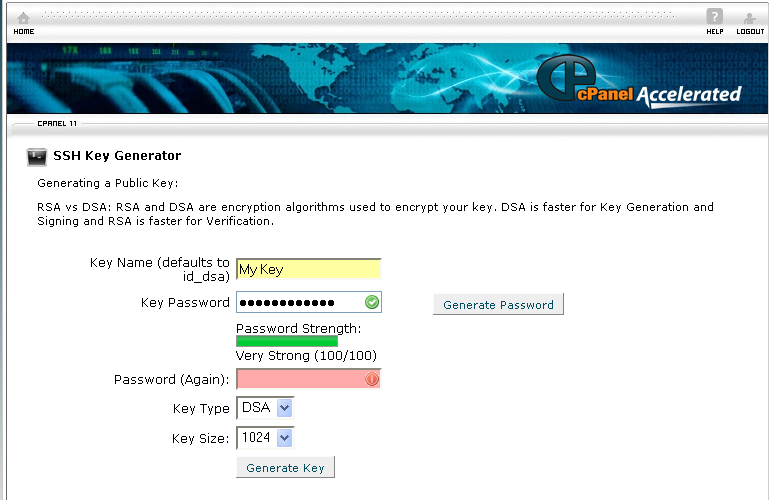
4. Enter a name for your key in the Key Name (defaults to id_dsa) text box.
5. Enter a password for the key in the Key Password text box.
6. If you want to use a generated password, click on the Generate Password button.
7. Copy the password to a notepad.
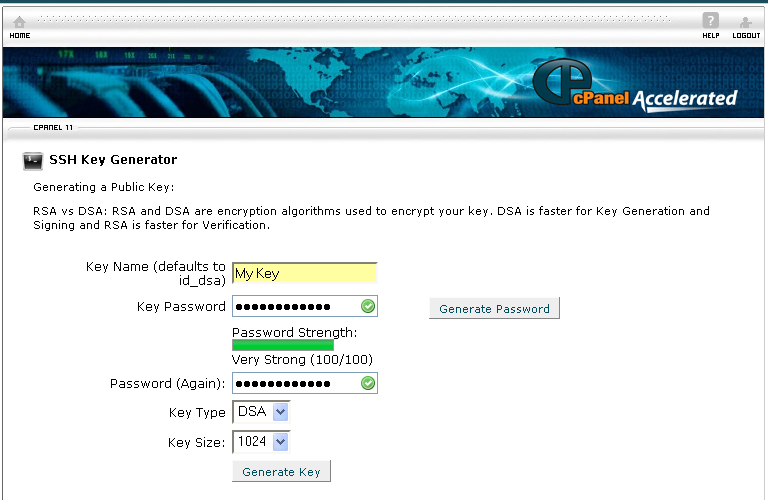
8. Reenter the password in the Password (Again)
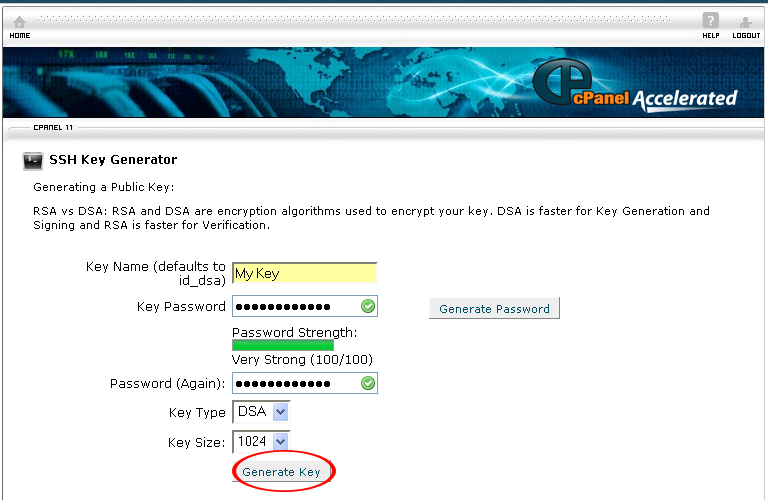
9. Click on the Generate Key button.
10. Click Go Back.
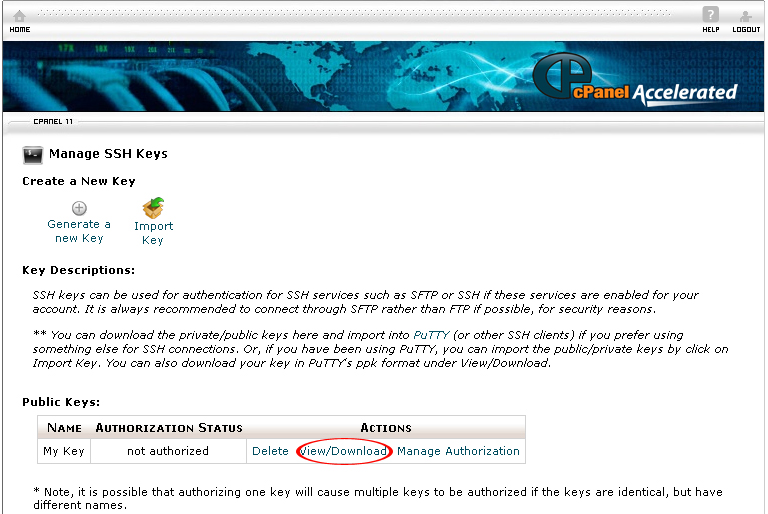
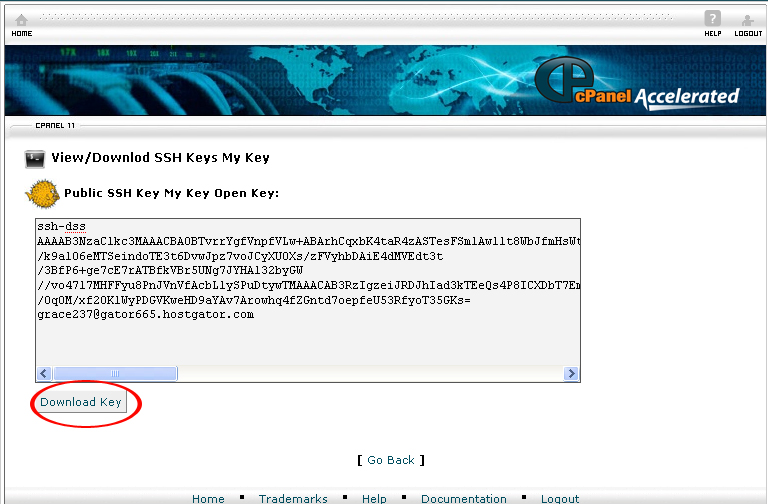
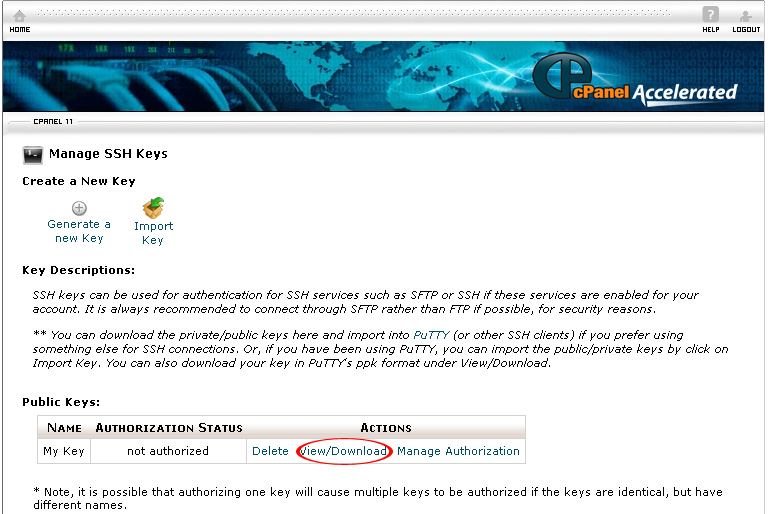
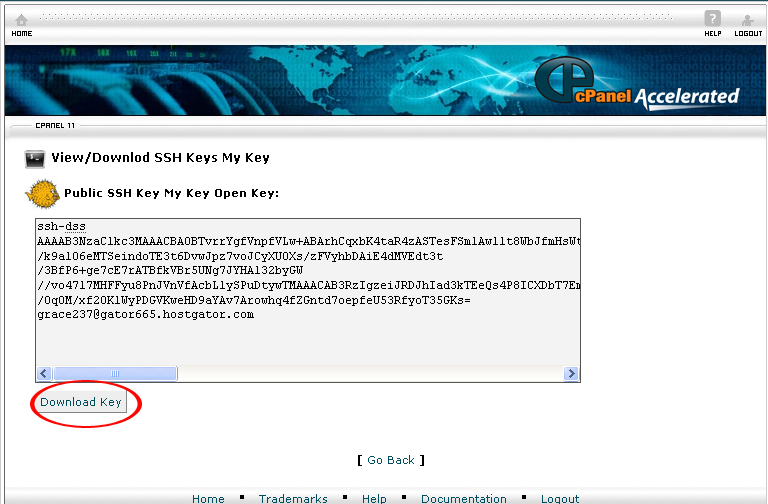
11. Select View/Download in the Public Keys section.
12. On the next page, click on the Download Key button.
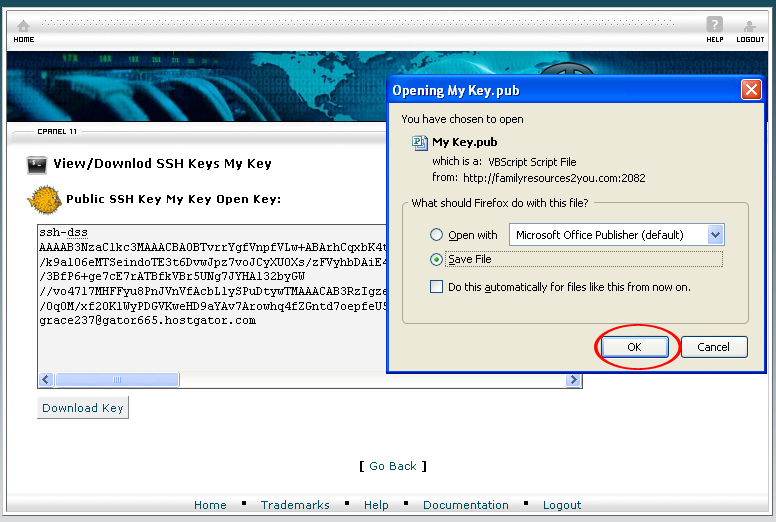
13. A screen pop up will prompt you to save the file. Click Save File.
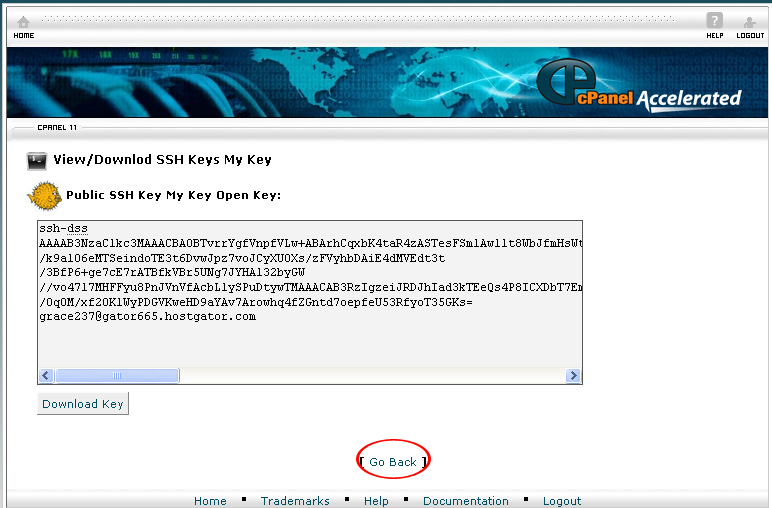
14. Click Go Back
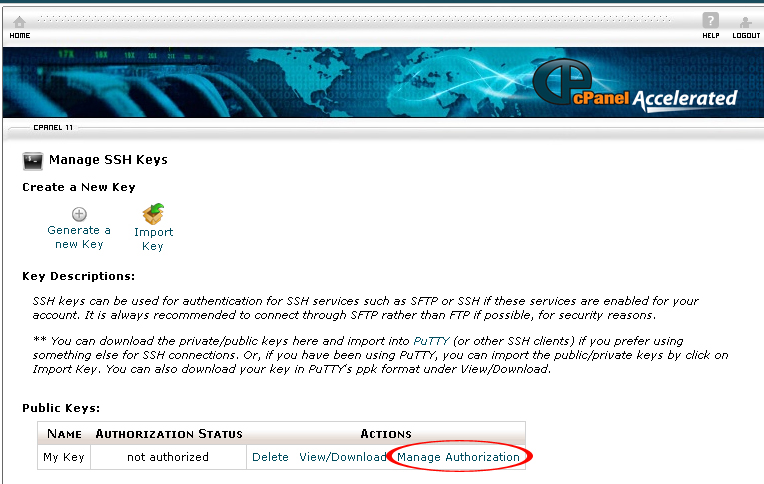
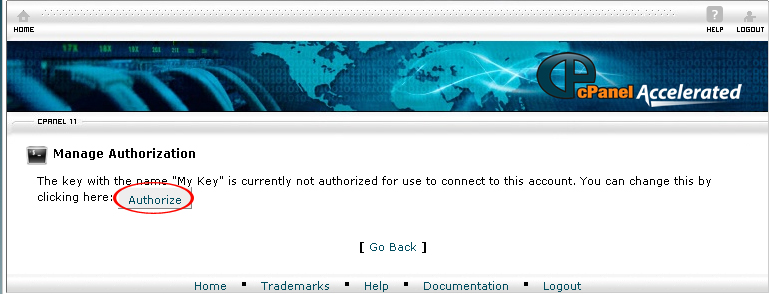
15. Select Manage Authorization in the Public Keys section.
16. Click Authorized
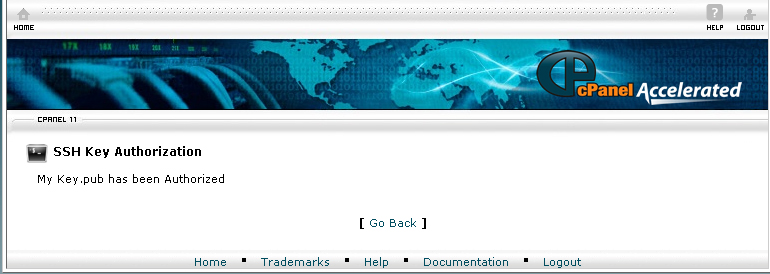
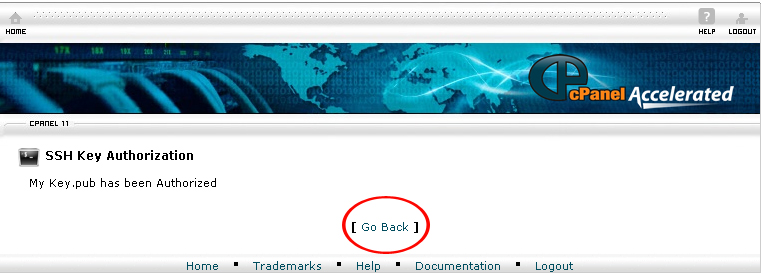
17. The Key is now authorized for use to connect to this account.
18. Click Go Back
19. Select View/Download in the Private Keys section.
20. Click on the Download Key button.
21. When prompt to save the file, click Save File.
By follow the above instructions, you will be able to create a SSH public key. Visit the Linode page for more details.
Learn also How to Download Unix.
