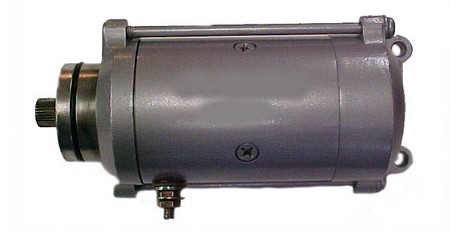
This guide describes the various ways in which the starter is taken out, unbolted, and repaired and later reassembled and fitted back into the bike.
To start with, starter is cylindrical in shape and is present below the surface of the tanker and at the top most point of the engine. Take a 10mm spanner and undo the two bolts, but from the off side of the bike. The earth connection should be noted in this process. The starter motor cannot be left free and unwounded until and unless the bolt is taken out. Under the top most position from the rubber corner, you should undo the bolt from the positive terminal.

At the same time, you have to make its sure that the positive terminal is not being unbolted. The unbolting should be done very precisely with well trained hands through the help of pipe grips and pliers. In case, the positive terminal is unbolted, the entire process turns into a very messy affair as it takes a lot of time to settle to the same position and the connection from the brushes will also be pulled off.
The bike should always be approached to the lower back side. This makes the entire coming out of the starter motor bit easily. In the course of taking the starter motor out, you should very effectively take out the bolt and turn out the starter motor anti clockwise. The bolt that takes hold of the earth terminal is very important and thus, should be taken out first.
In the process of pulling the bolt outside, the marker pen should be used for marking the main and essential casing which is in the line. The rubber seals should be saved in this process. The entire thing should be tried to realign in the most effective manner
Then, the 8mm socket should be used; the other two bolts should be uncapped. By doing this, these two bolts will easily come out of the body. Like other case, it’s not very important to grease the end. The end caps can be taken out easily. At the same time, when the rubber seals are taken out, they are done in such a manner that the entire reassembling also can be done with ease.
The connection ring copper is another important thing to look at. Around the axle, there are several other sections along the ring. It also needs to be cleaned with the Autoglym.
Two small rectangular shaped carbon brushes or blocks are present around the axle. These would move back and spring up when they are pressed with the finger. Accordingly, you can repair the inside of the starter and make sure that when you reassemble the entire starter, everything is back to its place.
Insert the starter back into its right place in the bike and once again bolt it. If you’re having trouble doing this, you may have done something wrong. Do not try to repeat the process, take your bike to the nearest Ducati Motorcycle Service shop and let an expert fix it. No doubt, you are not going to be disappointed any further.
Checking your air filters is an important aspect of a motorcycle tune up. In case you notice your air filter to be full of grime, clean it and re-oil it. However, if your air filter cannot be cleaned, visit a motorcycle repair shop like Moto Hub to adjust and replace it. A motorcycle’s air filters are crucial for ignition and combustion and you should take care to see that it functions properly.