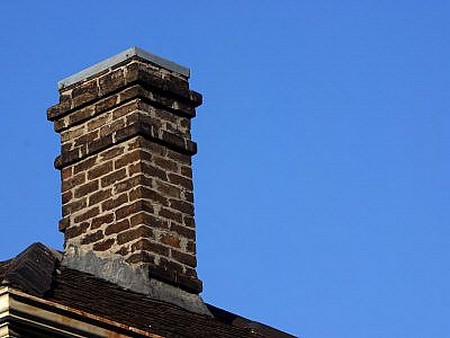
Chimney stacks are often neglected because of their relative inaccessibility. But they are sited in an exposed position and suffer badly from the ravages of the weather. Neglect often allows relatively minor defects to become more severe and often dangerous. Even if you feel unable to repair a chimney yourself, it is worthwhile periodically carrying out an inspection so that if any deterioration is detected you can employ a builder or residential roofing specialist to put it right before it gets worse. Periodic inspections can be carried out quite easily using a pair of binoculars and looking at the chimney from a number of vantage points around the house so that all sides can be looked at. You can also hire regular residential chimney cleaning services.
Minor repairs to a chimney can often be carried out using ladders for access. Use a conventional ladder to reach gutters and a roof ladder hooked over the ridge and laid across the face of the roof for access to the chimney. Place sacks between the ladder and the roof covering to prevent damage.
Never attempt to carry out major repairs such as replacing pots or areas of brickwork working off ladders. Erect a proper scaffold around the stack. If in doubt, employ a professional masonry contractor from a Chimney Masonry Repair company to come and do a chimney sweep. It is always best that for this kinds of jobs you hire an expert.

Insecure or damaged pots
Pots are secured to the stack by a cement flaunching. If the (launching has cracked or broken away from the stack, it should be removed and replaced a partial repair is liable to crack at the joints between the old and new material. To replace the pot, the flaunching will have to be removed use a club hammer and bolster to break it. Lower the old pot to the ground on a rope – chimney pots are very heavy. Then clean away the top of the stack with a wire brush and, if necessary, repoint the top course of brickwork.
Make up a new cement flaunching from one part cement to three parts sharp sand. Wet the brickwork on top of the stack and the bottom of the new pot, place the pot in position then build up the new flaunching to about 75mm deep around the pot. Trowel it smooth so that it slopes away from the pot in all directions – to throw rain away.
Defective pointing Defective joints should be raked out to a depth of about 20mm and all powdery material brushed away. Damp the brickwork before repointing with a mixture of one part cement to three or four parts soft sand with a plasticiser added to the water. The mixture should be just moist enough to be plastic. Apply it with a pointing trowel and press it firmly into the joint. Smooth it off to a weatherstruck joint.
Defective flashing
This defect will allow rain-water to run down the stack into the roof space and beyond. So look at the stack inside the roof space in your periodic inspections.
There are two major defects which occur with traditional lead flashing:
- the joint into the masonry may be loose, allowing water to run down the back of it. To remedy this fault, rake out the masonry joint and rewedge the lead flashing using strips of lead driven into the joint with a blunt chisel. Then re-point the joint
- the lead may have aged and developed small splits. A temporary repair can be effected by cleaning and drying the whole area and then spreading a bituminous mastic over the split.
To carry out a permanent repair you can have a peek at these guys to completely replace the flashing. This can be done with sheets of lead, zinc, aluminium alloy, a rigid bitumen-based material or with a purpose-made self-adhesive foil-backed flashing strip.
Replacement is fairly simple. First remove the lower layers of roof cladding (slates, tiles, and so on) to expose the edges of the flashing. Remove the old flashing with a cold chisel and rake out the mortar from the flashing joint to a depth of about 20 to 25mm. Shape the new Hashing to match the old use a sliding bevel to measure the angles. Wet the brickwork, place the new Hashing in position and wedge it in the Hashing joint. Replace the roof cladding and repoint the flashing joint.
Flashing is used to seal most joints between the roof and walls and where roofs meet – at the valley junction between roofs, for example. Sometimes it is called a different name the metal sheets or roofing felt used to seal the junction between the side of a roof and a wall are often called soakers. Replacement of most flashing is fairly easy and requires only a common sense approach the existing flashing should be examined and a similar replacement made.
Unused chimney? Where a chimney is no longer used (because a fireplace has been bricked up, say), it can be capped off with paving slabs. Fit airbricks to avoid condensation in the flue. Learn more with the Chimney Repairs Service here.
Smoke or fumes leaking out of a chimney – or stained brickwork and damaged mortar – indicate that the lining inside the flue is defective.
Replacing or installing a sectional fireclay liner is practicable only for very large chimneys and, even then, involves breaking into the chimney. A more practical solution is to employ a specialist contractor to line the flue with insulating concrete poured around an inflatable tube blown up inside the flue; for gas (or oil) appliances, a flexible stainless flue liner can be used.