The compost bin is at the heart of the organic garden. Every garden should have one, no matter how small the area. As you will see, you could even have a worm bin in the kitchen. There is great mystique attached to the making of compost and the composting process is complex, however, what you actually have to do is very simple. If you leave a pile of natural materials on the ground they will gradually but inevitably return to the earth. A pile of logs would take a long time, a heap of grass clippings and apple peelings would go down very quickly and neither “compost” would be of very good quality. But the process would happen without any help from you.
When you make compost you are just improving on the process: perhaps by speeding it up, so that your compost is ready sooner; heating it up so that more weed seeds and disease spores are killed off: or improving the structure and nutrient level of the finished compost, so that you can use it for different purposes.

There are various “recipes” for making compost but the basic ingredients are:
- Warmth, so some sort of shelter and insulation
- Air via some sort of ventilation
- Moisture, but not too much
- A good mixture of compostable materials
- An activator to get the process started
Given these conditions the most varied and unlikely materials will compost down into the right stuff—dark brown, crumbly and sweet-smelling.
Keep it together
A compost bin of some sort not only keeps it all tidy but helps the heap to heat up by keeping it together and insulating it from the wind and rain. The warmth encourages the activity of the organisms that break down the compost. The higher the temperature you can reach in a “hot” compost, the greater the sterilizing effect on weed seeds and disease spores.
The size of your bin will depend on how much material you’ve got to fill it (it’s hard to make too much compost) but a bin much smaller than a meter square is unlikely to heat up sufficiently.
Air is needed to aid this process, just as fires need air to burn. Rather than having slatted sides to the bin, start the heap with a layer of coarse material so that air can get in at the base, and create mini-chimneys in the heap by inserting vertical rods as it is built up, which can be removed at the end.
Two or more bins in a row will enable one heap to be composting down as the next is constructed. You can buy a standard wooden bin or you can build your own if you have basic carpentry skills.
The ideal bin is a wooden one, made of planks butted together. This can be made with three fixed sides and a removable front, for easy removal of the finished compost.
Alternatively you can make a series of frames which can be placed one on top of the other as the heap is built up and removed once it has composted.
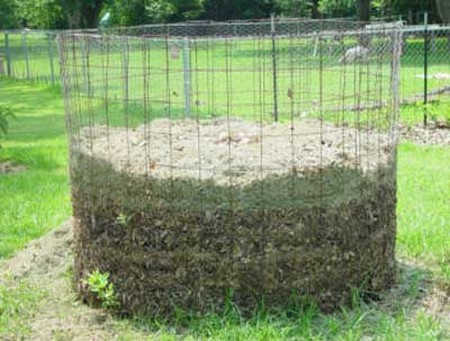
Another cheap way of providing an insulated bin is to use a double wall of chicken wire, stapled round four posts, with straw or hay packed down between the walls. This will obviously need rebuilding each season.
If you have a large area another temporary bin can be made with straw bales. These give excellent insulation and can be made to any size. The bales will eventually rot and can then be composted themselves.

There are also commercial plastic composter bins available. A very large heap can be made free standing, as long as the sides are firmed and as near the vertical as possible, and can be covered with old carpet or weighted down with bricks. These heaps need to be made all in one go.
Cover it up
Some sort of covering to the bin will help keep the warmth in and the rain out. Without any moisture the composting process would not happen—but too much rain will cool it down and produce a soggy collection of half-composted material. The ideal texture is that of a squeezed sponge. If the compost is too dry you may notice the white threads of “firefang” in it, or ants may be nesting in it. So moisture needs to be introduced as the heap is built up, by watering from the tap or water butt, or by applications of HLA (“Household Liquid Activator” or urine). Once the heap is completed it should be covered with a wooden lid (sloping to aid runoff), heavy carpet, or thick plastic, fixed and weighted down to prevent it blowing away. A thick hay mulch would also provide good insulation and protect from excessive rain.
Site the bin for ease of use. If it is close at hand rather than at the very bottom of the garden you are more likely to use it—though a small collecting bin can be kept in the kitchen and emptied daily into an intermediate bin outside the door. Since it is easier to move the ingredients than the finished compost, site it on the highest point of the garden if possible. That way you will be borrowing finished compost down to the beds. Set it on bare soil, so that worms colonise the heap and excess liquid drains off.
Composting
- is essential for keeping the soil in good health
- saves you money on bought-in fertilizers
- saves land-fill—25 percent of the contents of the average dustbin is compostable
- saves trips to the dump with lawn mowings, leaves etc.
- prevents air pollution from bonfires
- avoids over-exploitation of peat
Further Readings: