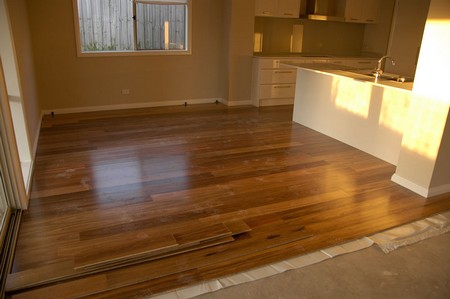
Floorboarding is produced in lengths that are intended to run from wall to wall. In practice this is rarely carried out entirely because odd, shorter lengths are often laid to save on materials. When lifting floorboards it is these shorter pieces that you should start with if possible. In many older homes one or two boards will probably have been lifted already for access to services.
Square-edged boards
Tap the blade of a bolster into the gap between the boards close to the cut end. Lever up the edge of the board but try not to crush the edge of the one next to it. Fit the bolster into the gap at the other side of the board and repeat the procedure. Ease the end of the board up in this way, then work the claw of a hammer under it until you can lift it enough to slip a cold chisel under it. Move along the board to the next set of nails and proceed in the same way, continuing until the board comes away.

Lifting a continuous board
Floorboards are nailed in place before the skirting boards are fixed, so the ends of a continuous board are trapped under them. If you need to lift such a board it will have to be cut.
Ease up the centre of the board with the bolster so that its full thickness is clear of the adjacent boards, then slip the cold chisel under it to keep it bowed. Remove the nails, and with a tenon saw cut through the board over the centre of the joist. You can then lift the two halves of the board using the same method as for a short one.
Boards that are too stiff to be bowed upwards, or are tongued and grooved, will have to be cut across in situ. This means cutting flush with the side of the joist instead of over its centre.
Locate the side of the joist by passing the blade of a padsaw vertically into the gaps on both sides of the board (the joints of tongued and grooved boards will also have to be cut. Mark the edges of the board where the blade stops, and draw a line between these points representing the side of the joist. Make a starting hole for the saw blade by drilling three or four 3mm holes close together at one end of the line marked across the surface.
Work the tip of the blade into the hole and start making the cut with short strokes. Gradually tip the blade to a shallow angle to avoid cutting into any cables or pipes that may be hidden below. Lever up the board with a bolster chisel as described above.
Freeing the end of a board
The end of the board trapped under the skirting can usually be freed by being lifted to a steep angle, when the 50mm (2in) gap between the joists and the wall should allow the board to clear the nails and be pulled free.
To raise a floorboard that runs beneath a partition wall, the board must also be cut close to the wall. Drill a starting hole and then cut the board as close to the wall as possible.
There is a special saw that can be used for cutting floorboards. It has a curved cutting edge that allows you to cut a board without fully lifting it.