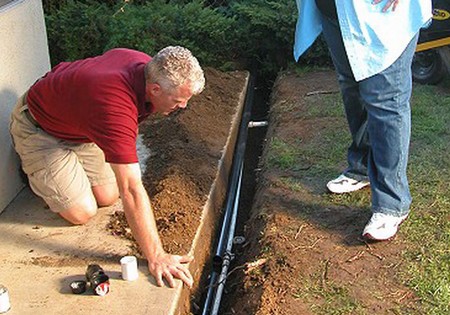
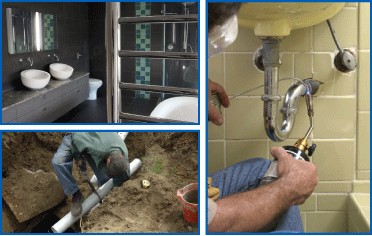
The techniques for bedding drainpipes on the bottom of the trench and for filling in the trench afterward depend to some extent on the type of soil and the attitude of the local authority.
Cured in Place Pipe Lining Installation Services may be done directly on the surface of the trench if the soil is suitable (clay or chalk probably would not be). If the pipes are socketed, the trench base will have to be scooped out to take the sockets so that the bottom of the pipe can rest on undisturbed soil. Usually, clay pipes have to be laid on a bed of gravel about 100mm thick, and the first lot of soil used to fill in the trench (called backfill) should have all the stones, large lumps of clay and so on removed. In some cases, it may still be necessary to lay clay pipes on a bed of mortar. You may also consider getting septic tank services to inspect and make needed repairs while laying drainpipes to save time and money. If your house is connected to a sewer system, you may want to schedule a sewer inspection before installing any additional pipes to avoid damages.

Pitch fibre and PVC pipes are usually laid on a 100mm thick bed of gravel. With
PVC, the gravel fill should be continued above the level of the top of the pipeline. The first 300mm or so of backfill again has to be selected soil.
When laying a new drain, the first thing to decide is where the new drain will connect with an existing one. It is usually best to make the connection at an existing inspection chamber – cutting into an existing pipeline to form a new chamber is a bit more tricky. Make sure, though, that when the drains are laid at the correct level they can be fed into the inspection chamber. Household drains usually have a slope of one in forty (for every 40m run of pipeline, the level at the end furthest from the house has to be I m lower than the level at the end nearest the house). This slope has been arrived at through trial and error as being the right value to make the drain self-cleansing: if the slope is much shallower, the flow of water would not be fast enough for the solid waste matter to be carried along with it; if the slope is much steeper, the water would tend to flow over the solids.
The level of the bottom of the drainpipe (called the invert level) at the inspection-chamber end is often the same as the level of the top of the main channel running through the base of the chamber. The level of the drain at the house end should be a minimum of about 300mm below ground level if the drain is being connected to a single-stack waste pipe; a bit less otherwise (though drains should not really be laid any closer than about 600 to 900mm from the surface).
Measuring the difference between these two levels may not be easy, particularly if the two points are a long way from each other, or if the ground between them slopes. It may be possible to refer the depths to a known horizontal line, such as a damp-proof course on the side of the house, or it may be necessary to use a water level.
Unless you are used to cutting clay pipes or can plan the layout of the drain so that no cutting is needed, it will probably be best to use PVC pipes. Plan the whole layout using a manufacturer’s catalogue, which will tell you what radius and angle of bends, depth of gullies and so on are available.
Laying a new drain (though not repairing an existing one) requires Building Regulations approval – before starting work, you should submit plans to your local authority, and get them approved. The Building Control Officer will probably want to see the trench before the drain is laid, the drain after it is laid before it is covered up, and the completed works.
Dig the trench so that it is not too wide – about 500mm – and in a straight line, except at properly made bends.
If you are able to lay the pipe directly on the bottom of the trench, make sure this is flat, with no large stones or lumps in it, and with holes cut to take any pipe socket or sleeves. Ensure that the pipe itself will be laid on firm, undisturbed soil – do not use pieces of wood or brick to support the pipe. The Building Control Officer should be able to tell you if the pipe needs to be bedded in and surrounded with loose fill, and whether you can use the soil excavated from the trench itself or whether (as is usual) the fill has to be coarse aggregate. If fill is needed, dig the trench about 100mm deeper than required, lay fill to a depth of 100mm and tamp it down to the correct level and slope.
Lay the pipe, following the manufacturer’s instructions for jointing. Often, whole lengths can be jointed on the surface and lowered into the trench. If the soil pipe has to pass through the house wall, fit a lintel over it.
Joining the new drain to the old one at the inspection chamber end involves breaking a hole in the wall of the chamber and chopping away the benching in the base. Bed the new branch channel (of the same material as the new drain) in cement and sand so that its end discharges over the main channel. Pass the end of the new drain through the hole in the side of the chamber and connect it to the channel following manufacturer’s instructions. Build up new benching around the new channel to match the old and finish it off with smooth, sloping sides. The hole in the chamber wall around the new drain should then be filled in with bits of brick mortared into place. The mortar mix should be between 1:1 and 1:3 (cement : sand).
If a new inspection chamber is to be made, the position of the existing drain has to be located and a large hole dug down to it. Be sure to take precautions against the sides collapsing while the chamber is being built. Break into the old drain carefully.
The brick sides of an inspection chamber, and the drain channels and concrete benching, should be laid on a thick concrete base.
The old drain will probably be of clay pipes, and it is usually difficult to position the chamber to avoid cutting these. An alternative to cutting is to connect short lengths of PVC pipe (using proprietary couplings) to the old drain and then lead these into the new inspection chamber.
If the old drain has PVC or pitch fibre pipes, making a new inspection chamber is a bit easier. With new drains, the job of installing an inspection chamber can be a lot easier if a ready-made plastic chamber or precast concrete chamber is installed. You may need to contact a 24/7 emergency plumbing expert if you encounter any issues with your plumbing system.

Before the trench is backfilled (and possibly after), the Building Control Officer will almost certainly want to test the drain to ensure that it is watertight.
In an air test, drain stoppers are used to block off the drain – for example, at the entrance to the inspection chamber and at the top of the vent pipe. One of the drain stoppers has a nipple in it to which a U-tube pressure gauge can be fitted. The drain is then pressurised, usually by blowing down a tube connected to another stopper, until the pressure gauge reads about 100mm of water. To pass, the pressure should not drop below about 75mm within five minutes.
In a water test, the drain is stoppered off as before and a length of pipe 1.5m high is connected vertically to the highest point of the drain. This pipe and the drain are filled with water. To pass the test, the amount of water lost from the drain should not exceed 0.05 litres per metre length of the drain over a period of 30 minutes. The water test is more stringent than the air test and can be used to test inspection chambers as well as the drains themselves.
The requirements for passing the test may vary from those given above – the pressure in an air test may be less, and the head of water in a water test may be lower than 1.5 m. There are other methods of test, too. A Building Control Officer may carry his own drain-testing equipment; if you hire it, you can do your own tests first.
For backfilling, use aggregate or loose fill first followed by the rest of the materials dug out of the trench. Tamp down in thin layers.