Open X is an open source advertising application which is authorized by the GNU General Public License. Open X has an administration panel where publishers can oversee the ad network through the banner management interface and tracking system. Open X allows publishers to rotate banners from their in house advertisements as well as third party advertisement for example Yahoo and Google advertisements.
According to the statistic, Open X has more than 50,000 publishers that serve more than 300 million ads every month. Open X is the most popular ad server until now. Before OpenX, it was called phpAdsNew. phpAdsNew was developed by Tobias Ratschiller during 1998. In 2000, Wim Godden decides to expand phpAdsNew with more features. However, this only take place a few years later because phpAdsNew was already very popular and it became difficult to change the name. In 2001 and 2002, Wim Godden joined effort with Niels Leenheer and Phil Hord to improve phpAdsNew b adding features and amending the features of the existing ones. After this, phpAdsNew version 1.90 was released and soon there was a completely revised version 2.0. After it becomes very popular, it was renamed to Open Ads. When version 2.4.4 debut in 2007, Open Ads was renamed to Open X.
OpenX allow publisher to sell advertisements to buyers in a live auction without incurring any entry fee. OpenX is the first company to develop software that allows publishers to sell advertisement spots on their websites to ad buyers in a real time auction. Through OpenX, publisher will be able to oversee the ad network including guaranteed, not guaranteed and unsold.
If you want to install OpenX through cPanel, follow the instructions below:
Procedure:
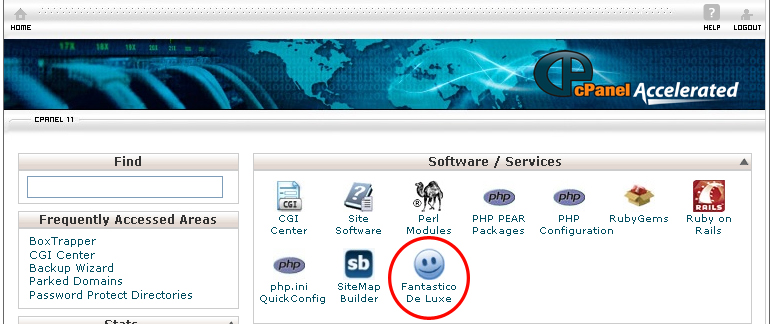
1. On the homepage of your cPanel, click on the Fantastico icon. This will take you to the home page of Fantastico.
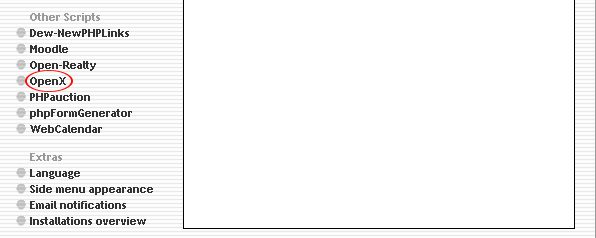
2. Click on OpenX in the Other Scripts section on the left Navigation bar.
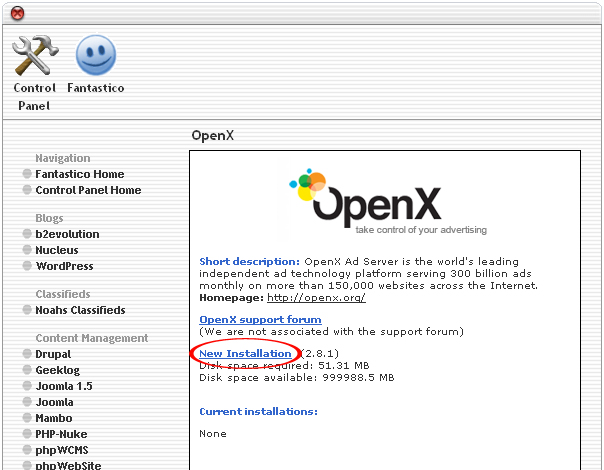
3. Click on New Installation.
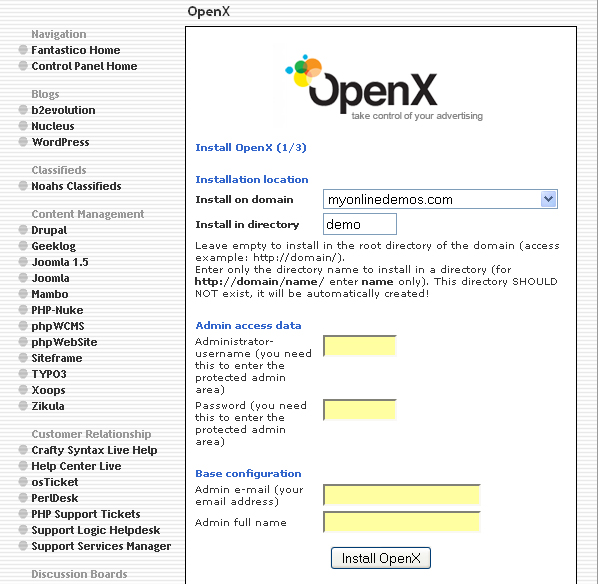
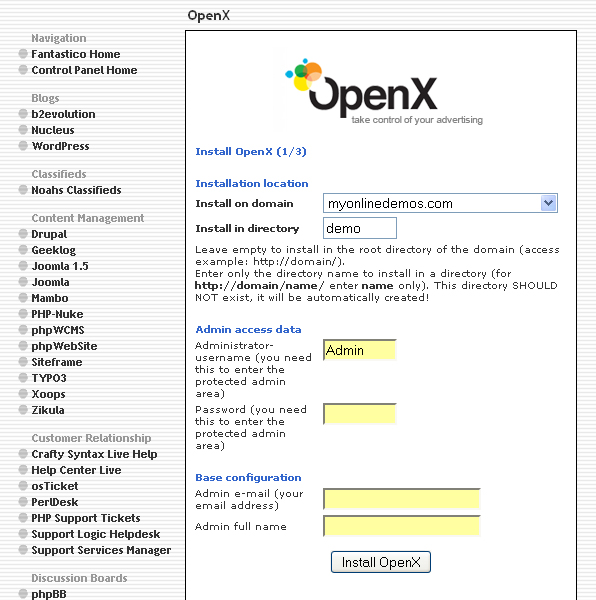
4. Select the domain from the drop down menu.
5. Enter the name of the directory where you want to install OpenX in the Install in directory textbox. If you want to install it on the homepage, leave the textbox empty.
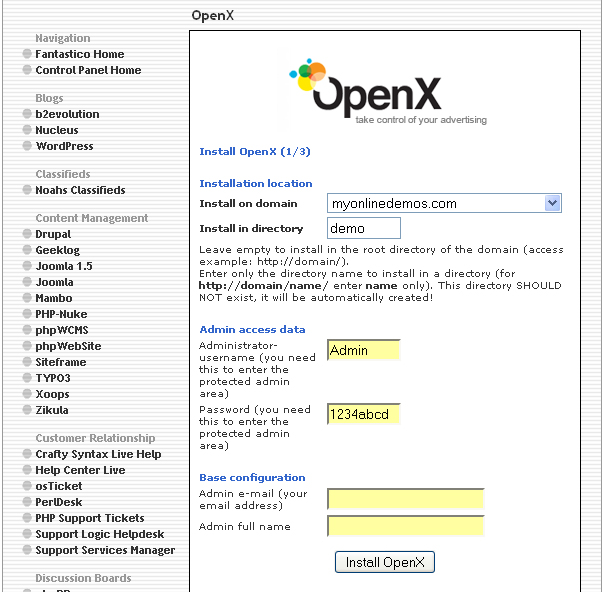
6. Enter the username in the Administrator username textbox.
7. Enter the password in the Password text box.
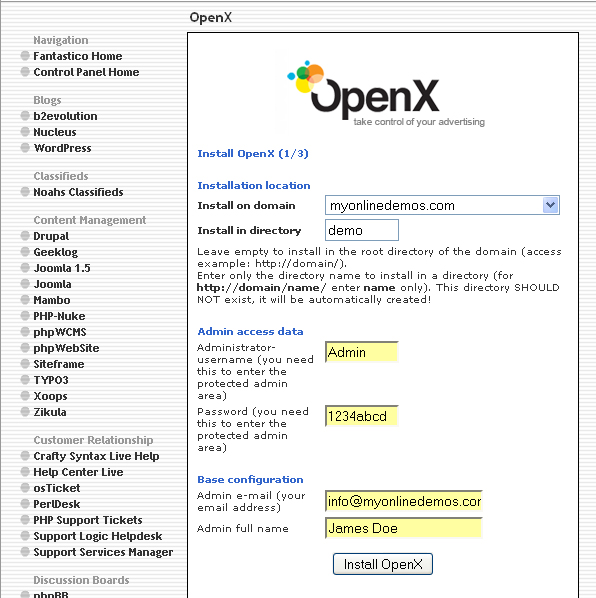
8. Enter an email address in the Admin e-mail text box.
9. Enter your full name in the Admin full name textbox.
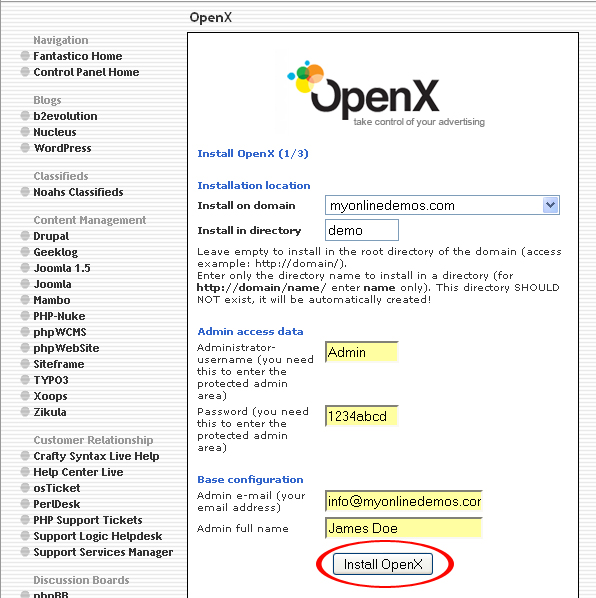
10. When you are done, click the Install OpenX button.
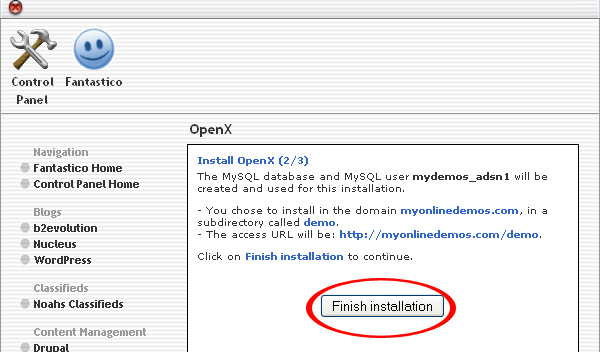
11. Click the Finish Installation button.
12. OpenX is now successfully installed.
Open X provides many features including banner rotation, click tracking, campaign targeting, and ad capping. By following the steps above, you will be able to install OpenX on your website through Cpanel.
