Geeklog is a PHP/MySQL application that allows you to manage dynamic content. Geeklog supports comments, trackbacks, RSS, spam filter and etc.
Geeklog allows its user to create a post and publish it on the site. You can also save the entry to publish at a future date. The administrator can allow multiple authors to post on the Geeklog site. You can also embed a picture in the articles. Visitors that read your posts will be able to leave a comment. You can also allow users to submit and contribute content to the website. There is a calendar feature that allows you to create a personal calendar.
Geeklog has a user friendly interface that supports multiple languages. The administrator can customize the look and feel of the website through a theming engine. The user accounts and access controls are secured. All admin accesses are logged and passwords are encrypted. In addition, there are many plugins which can add more functionality to your Geeklog site. The plugins are contributed by freelance developers.
Geeklog was initially written by Hason Whittenburg for the Security Geeks web site. In 2001, Jason passed on the administration of the project to Tony Bibbs. Now Geeklog is under the maintenance of Dirk Haun. Geeklog is an open source application.
If you want to install Geeklog through cPanel, follow the instructions below:
Procedure:
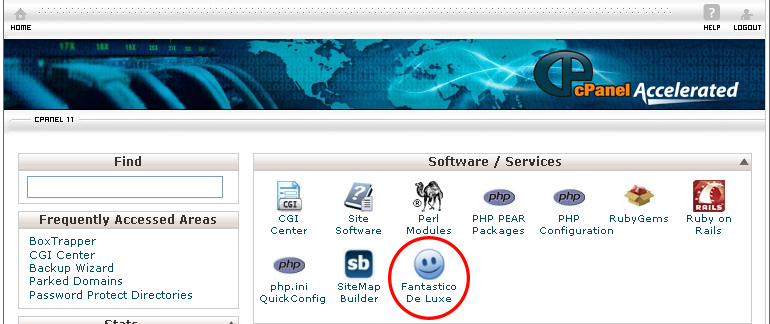
1. On the homepage of your cPanel, click on the Fantastico icon. This will take you to the home page of Fantastico.
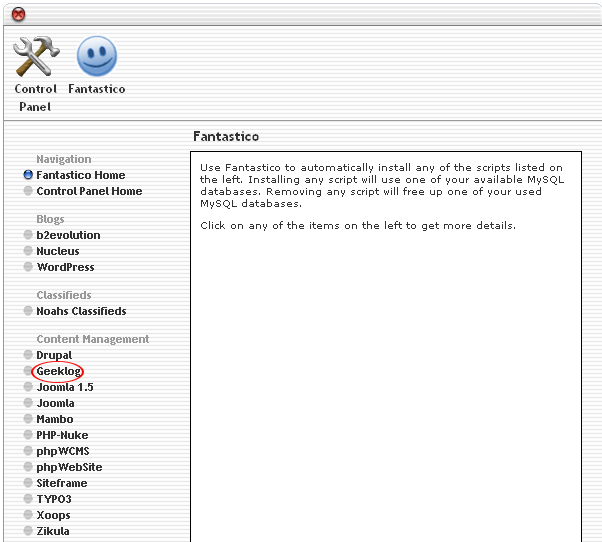
2. Click on Geeklog in the Content Management section on the left Navigation bar.
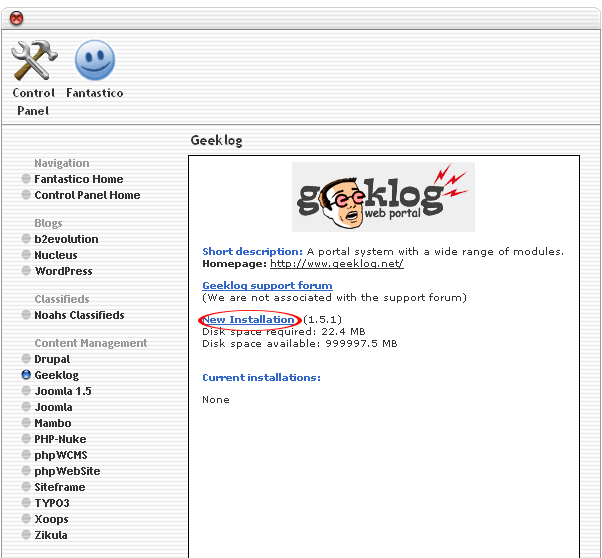
3. Click on New Installation.
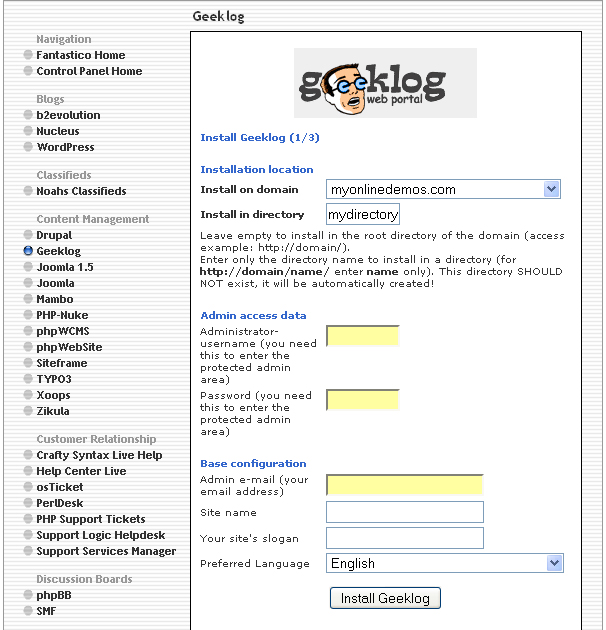
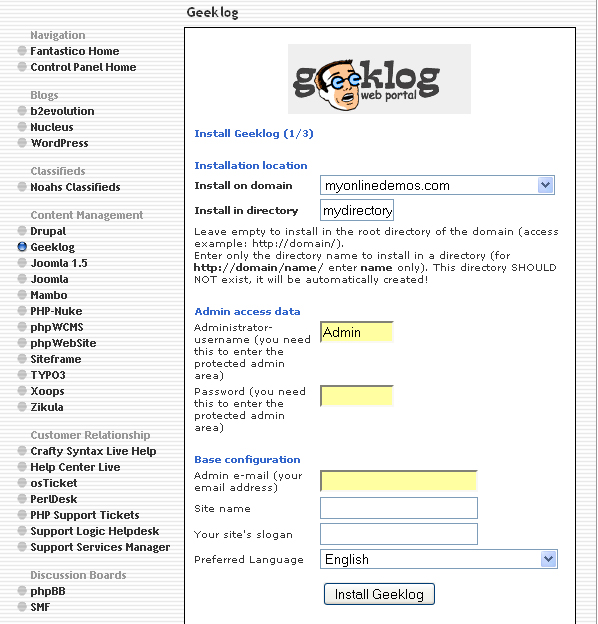
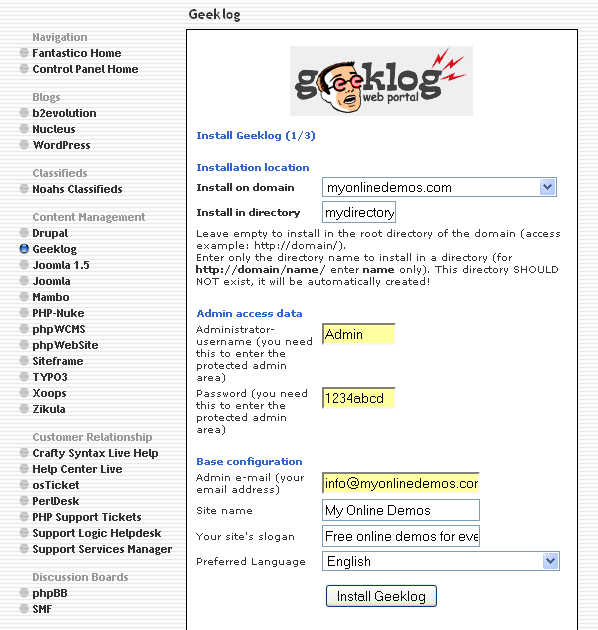
4. Select the domain on which you want to install Geeklog from the Install on domain drop down menu.
5. If you want to install Geeklog in the root directory of the domain, leave the Install in directory text box empty. If you want to install Geeklog in a directory, enter the directory name. This directory should not be existed. It will be automatically created.
6. Enter a username in the Administrator-username text box. You need this to enter the Geeklog administration area.
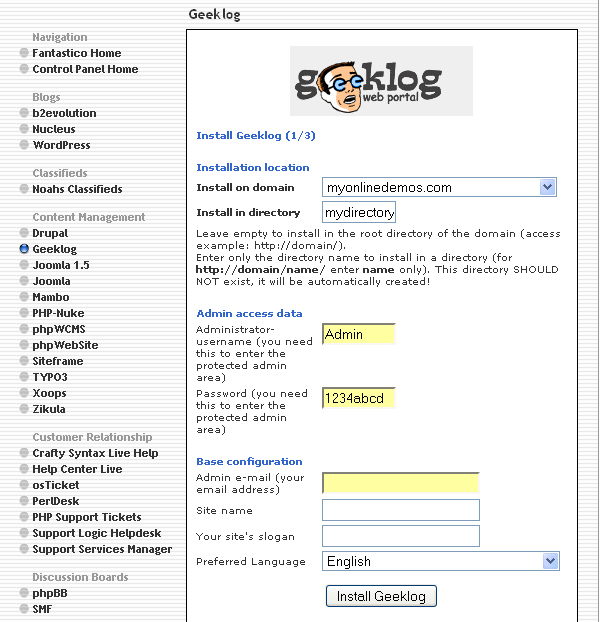
7. Enter a password in the Password text box. You need this to enter the Geeklog administration area.
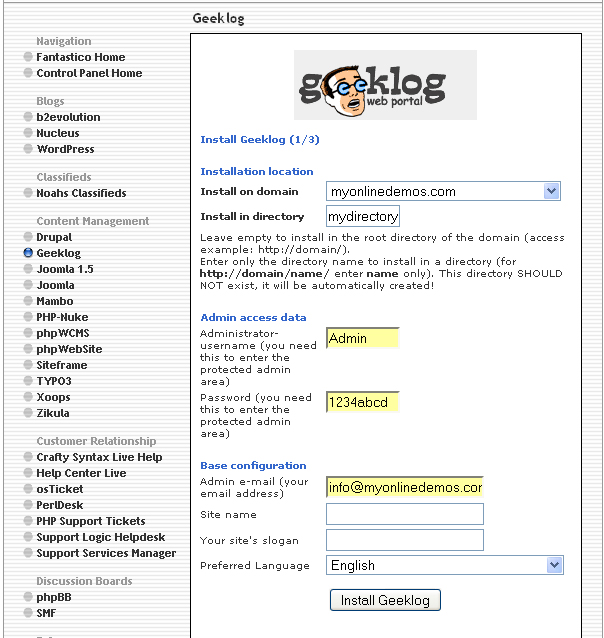
8. Enter an email address in the Admin e-mail text box. All Geeklog notifications will be sent to this email address.
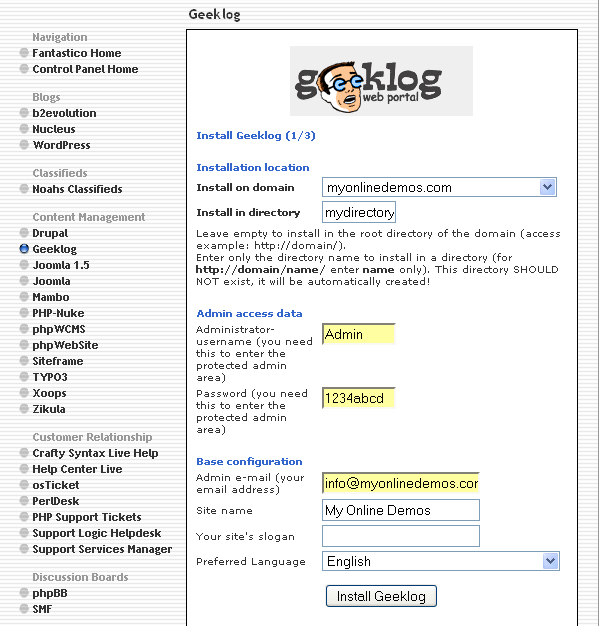
9. Enter a name for the site.
10. Enter a slogan for your site in the Your site’s slogan.
11. Select your preferred language from the Preferred Language drop down menu. The default setting is your cPanel default language.
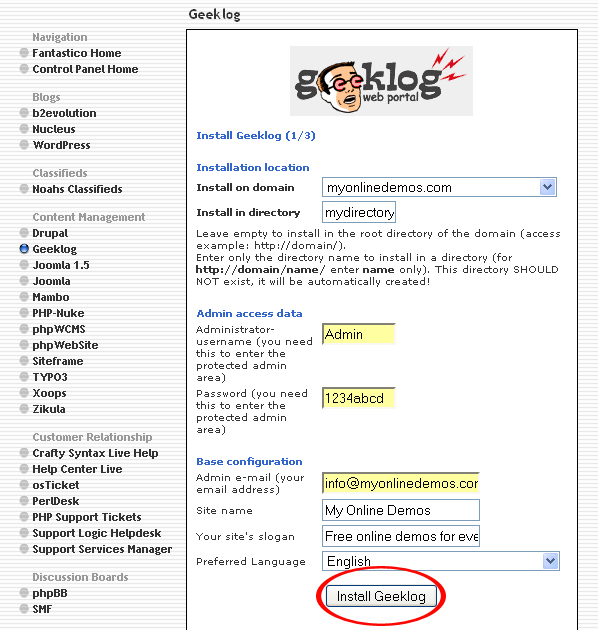
12. When you are done, click the Install Geeklog button.
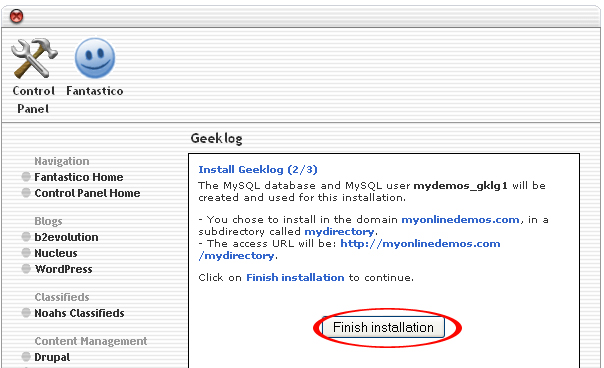
13. Click the Finish Installation button.
14. Geeklog is now successfully installed.
If you follow the steps above, you will be able to install Geeklog on your website.
