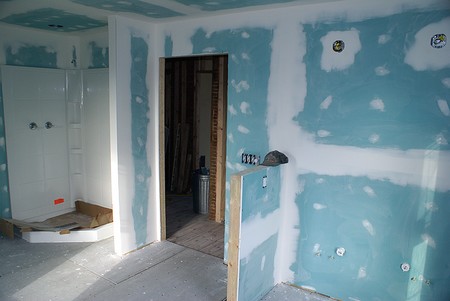
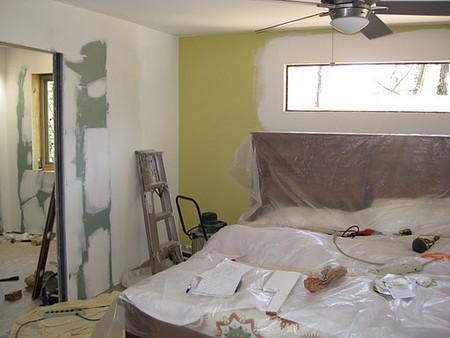
Walls not only have to be durable and look good, but they also are responsible for keeping moisture-laden air from escaping the room. Whatever type of wall surface you install, it should be detailed for both needs. In case you notice visible damages on your walls, you may need to hire a drywall repair contractor. A residential bathroom remodel may also include the installation of a drywall.
MR drywall is commonly used in bathrooms because it doesn’t absorb water vapor like regular drywall does. I’m not convinced, though, that regular drywall with a good low-perm paint doesn’t perform just as well; after all, both types of drywall will deteriorate in the presence of a real water problem. Still, the distinctive green coloring of MR drywall makes its absence noticeable, and the perception of quality by clients is an important factor in construction. Besides MR drywall, I also like to use galvanized drywall screws in bathrooms instead of nails or regular drywall screws. While regular drywall screws and nails have some corrosion resistance, I think that the slight extra cost of galvanized screws is more than offset by

the sense of security that I get knowing that rustspots aren’t likely to appear if the screw heads are exposed to bathroom humidity. And screws are much less likely to pop than nails are. They hold the drywall to the framing tenaciously, even as the framing dries out and shrinks.
Using a construction adhesive to glue drywall to the framing adds a little to labor costs, but it also reduces the number of screws that will be needed to fasten the sheets to the walls. Typical screw spacing is 16 in. o.c. on walls (12 in. o.c. on ceilings), but glued drywall needs only three fasteners in each framing member—one on each edge and one in the middle. Although it doesn’t do any good to glue drywall to framing that is covered with a poly vapor barrier or with the ears of kraft-paper-faced fiberglass insulation batts, a glued installation is quieter and stronger than a nonglued one.
Assuming that all of the systems are in place and that there is blocking for items like grab bars and towel bars, actually hanging drywall in the bathroom is a process that goes fairly quickly because pieces are usually short and the room is small so that there aren’t a lot of them.
There is a fair amount of cutting and fitting to accommodate electrical boxes and fixtures, so I use a 4-ft. T-square for measuring and a drywall saw, utility knife, and/or a drill-mounted hole saw for cutting. Some installers use a drywall cutout tool, a small router with piloted bit, but I’ve seen too much nicked Romex and too many chewed up electrical boxes to be comfortable with that setup. Because the sheets are usually not full size or very heavy, the little extra handling involved in marking boxes in place and then removing and cutting them before final fitting is sometimes faster and easier than measuring out everything. A little chalk, pencil lead, or lumber crayon spread on the perimeter of the box will leave an outline on the backside of the sheet when pressed against the wall.
It isn’t necessary to be compulsive about fitting drywall. Gaps and measuring errors can be easily corrected with setting compounds like Durabond, which dries by a chemical reaction rather than by evaporation and which is available with different drying times. Before taping with regular all-purpose joint compound and paper tape, fill cracks and gaps—for example, at the wall/ceiling intersection—with Durabond. I use fiberglass mesh tape with Durabond where there are seams because it is self-adhering and easy to use. And I make sure to smooth the stuff carefully because it is very hard to sand and isn’t water soluble. Outside corners that have a metal corner bead are also a good place to use Durabond, partly because it is far more durable and resistant to bumps and gouges than regular compound, but also because even thick layers of it dry quickly, making it possible to recoat the same day. I also use Durabond to fill in gaps around plumbing cutouts, even if they will be covered by a vanity. In general, if there is a penetration through the room’s envelope that will allow any air to escape, it should be filled in, no matter where it is.
The object of taping drywall is to create the illusion of seamlessness, and each taper seems to have his own specific approach to achieving that result. A small room like a bathroom is a challenge to tape well because it seems to consist of all corners and edges. If there are any butt joints (places where nontapered edges meet), I try to cleanly taper back both edges at a 45° angle with a utility knife during installation so that paper doesn’t get pushed up proud of the surface and create a high spot. The joint then gets taped with paper tape (I almost never use fiberglass mesh tape except with Durabond because it isn’t as strong as paper and is more likely to crack with regular joint compound), and I make the joint double width to have enough room to feather the edges so that there won’t be a hump where the seam is.

Sanding is probably everybody’s least favorite part of the process, but if you’ve taken care to feather joints and keep things smooth, it should go quickly. I use both a pole sander and sandpaper mounted in a half-sheet sanding block. There are pole sanders with integral dust-collection/vacuum systems, but I’ve never tried one. If it works and makes sanding easier and less messy, then it sure would be worth almost any price. I’ve found that a clamping work light is indispensible for finding irregularities while sanding, including paper bubbles (where the paper tape hasn’t been fully embedded in joint compound), nicks, and depressions. Shining the light along the wall will highlight these imperfections, and the more light you have in the room during the taping process, the better the results. After the room has been sanded, I sweep off everything, vacuum thoroughly, and wipe everything down with a large sponge. An inexpensive sponge mop works great for this: It quickly removes dust and smooths joints and is easy to wring out in a bucket of water.