Buy all the wallpaper you need at the same time, making sure that all the rolls carry the same batch number and look the same colour. If you are using a pattern with a large repeat you may need to allow for more paper. Store the rolls flat until you are ready to use them. Clear your walls of obstacles, if possible removing radiators, electric plates or switches, picture hooks, wall lights, etc. If necessary, hang lining paper first, using it horizontally and never overlapping the joins. Leave it to dry for at least twenty-four hours before papering the final layer. Before papering make sure that all paintwork in the room has been completed.
Planning your work
If your paper is plain, or has a small pattern, start papering near a corner on the window wall and work round the room to the door in both directions. If your paper has a large pattern, centre it in a prominent place, such as over the fireplace, and work outwards in both directions. Hang all ceiling paper parallel to the main window in the room, starting at the window and working away from it. Find wallpaper removal companies to help you through the remodeling process.

Cutting
Always cut several lengths of paper at once, having made sure that the design matches. After cutting, number the strips on the back so that you know in which order to hang them. Always work from two or three rolls at the same time to reduce wastage. If the wallpaper has a large pattern, cut it so that the main pattern unit appears at the top of the wall after trimming. On each length allow an extra 2 in (5 cm) at both the top and bottom to help with positioning and trimming. This extra is also useful in the event that you have not measured the length accurately.
Pasting
Make sure you are using the correct glue and following the manufacturer’s instructions. Always paste from the centre of the paper out to the edges, trying to avoid the glue seeping from underneath the paper onto the right side. Make sure each length is evenly soaked with glue and for the same amount of time. Then fold the paper, so that there is a large fold at the top and a smaller one at the bottom, with the pasted surfaces together. Remove any glue from the table with a sponge and some cold water before you paste the next sheet of wallpaper on it.
Hanging the paper
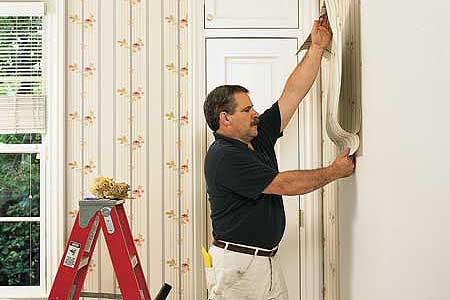
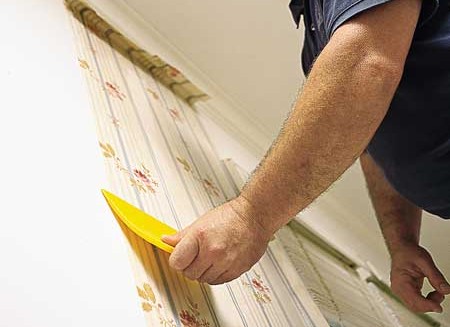
When you reach the wall, hold the top end of the paper by the corners and let the paper unfold. If you are using very long lengths of paper, ask someone to hold the paper so that it does not tear. Make sure the first length is straight by using a plumb bob. When the paper is in place, brush it out from the centre, smoothing out any creases or air bubbles. If wrinkles appear, gently peel the paper back then brush it down again firmly; small wrinkles may disappear on drying. Air bubbles can be removed by pricking them with the point of a sharp knife and then brushing the paper out flat.
If a bit of paper is not sticking, paste it again, then press hard. Keep a sponge or cloth handy to wipe off excess paste. To neaten the ceiling line, or trim round a doorway, use the point of your closed scissors to score the line you wish to cut; then pull away the paper and cut the required shape.
Corners
Never hang a length of paper so that more than 5 in (13 mm) goes round to the adjoining wall. Cut it before hanging and brush it well into the corner. Once you have turned a corner, establish another vertical on the adjacent wall with your plumb bob.
Blistered wallpaper
If your paper blisters there are two possible courses of action. The simplest solution is to inject some wallpaper paste into each blister; this only leaves a pin-prick. You do this by filling a syringe with wallpaper paste and injecting a small amount into the centre of each blister. Leave the paper for five minutes to give it time to absorb the paste and then gently flatten the blister to the wall with your fingers. Go over the blister with a roller until it is completely flat.

The other solution is to cut the blister and paste the paper again, which leaves larger cut-marks. You do this by cutting vertically and horizontally across the blister with a sharp knife, cutting slightly beyond the edge of each blister. You then pull back the corners of the blister and, using a small paintbrush, paste the wallpaper and leave it for a minute or two to soak. Then push the flaps back against the wall and flatten the area lightly with a seam roller.
Peeling wallpaper
If your paste was diluted too much, or spread too thinly, your wallpaper may start to peel off or wrinkle. If this happens, lift the peeled section and apply a multi-purpose adhesive or a newly mixed, slightly thicker, solution of wallpaper paste. Roll back the paper lightly and smoothly.