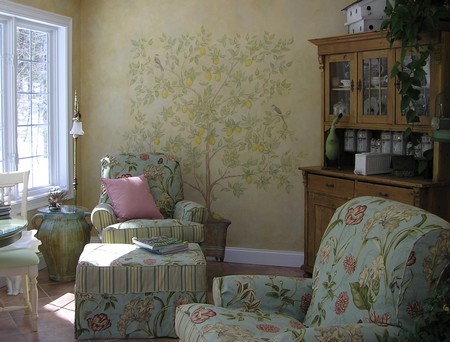
Creating a mural is enormous fun and a great way to allow your artistic side full rein. This does not mean you need the technical and artistic virtuosity of a Michelangelo – a mural can be as simple as painting a colourful rainbow to frame the door of a child’s bedroom, or as small in scale as a trellis covered in climbing plants in an alcove area. Murals do not have to be confined to wall surfaces either. Doors and cupboard doors are perfect for this treatment and provide a useful framework within which to work.
The secret to a successful mural is to keep everything simple. Some of the most beautiful and striking examples of murals are the wall-paintings that adorn the tombs of the Ancient Egyptians and Etruscans, the palaces of Crete and Roman villas. These murals show stylized images of both plants and animals on plain or abstract backgrounds, often with patterned borders. There is always a stunning use of colour.
Whilst these ancient murals provide inspiration, when attempting your first mural you may like to choose a more modern theme. In a child’s room, you could paint a blustery sky with clouds and brilliant patches of blue along one or more walls. The sky can then be filled with anything from colourful balloons and kites to your child’s favourite fairy-tale or cartoon characters. It is a good idea to paint these separately onto paper or card and stick them onto the wall – this makes them easy to replace as your child’s tastes change. In a small dining room or in a corridor, a series of stylized lemon trees in pots, as shown in the following project, perhaps alternating with orange trees, is very attractive. A decorative border above and below the trees will clearly define the space. You can either stencil on your border or you can stick down one of the many excellent ready-made border papers that are available.
A completely different use of mural work is trompe-l’oeil, the art of tricking the eye. The idea is to create a three-dimensional effect on a flat surface. To be truly effective, however, this work is probably best left to the professional.
In the following project, you are shown how to paint a stylized lemon tree. This can either stand alone or be part of a frieze.
You will need:
- Plain painted wall or a wall hung with lining paper
- Pencil
- Stiff paper or cardboard for stencils
- Scissors
- Masking tape
- Stencil brush
- Ruler
- Medium-sized tube of yellow acrylic paint
- Medium-sized tube of brown acrylic paint
- Medium-sized tube of green acrylic paint
Method
- Prepare the wall area. If you are going to paint the mural directly onto the wall, you will need to clean the wall surface first. Or, if you like, you can cover your wall in lining paper, and paint the mural onto this. Obviously the size of the mural depends on the size of the wall. However, you should follow these dimensions: the pot should be smaller than the tree top; the stem should be about three times the height of the tree top. The width of the stem should be about 5-7.5 cm (2-3 in) depending on the size of your tree. Altogether, your mural should be two thirds the height of the wall.
- Next make the stencils. You will need to make stencils for the lemons, the pot and the leaves. To make your lemon stencils, draw on paper three different sizes of lemons. Then cut out the shapes. If you like, you can copy real lemons. Make the leaf stencils in the same way. An excellent way of drawing the pot outline is to take a sheet of paper and fold it in half. Draw the shape of half a terracotta pot. Cut out the pot shape and open out the paper.
- Attach your pot stencil to the wall with masking tape. Paint inside the stencil with the yellow acrylic paint. Leave it to dry. Then, with the stencil brush, stipple over the yellow in brown acrylic paint, allowing the yellow to show through. To stipple, dip the brush lightly in the paint, hold the brush at right angles to the wall and dab the paint on. Do not press too hard.
- Measure your stem length and width with a ruler and mark it in with pencil.
- Now, start on the lemon stencils. Hold a stencil against the wall and stipple with the stencil brush using the yellow acrylic paint. Do not put too much paint on the stencil brush as it may drip. If the stencils get a little soggy, let them dry out before you continue.
- Stick masking tape down the stem outline and with the stencil brush paint with brown acryllic paint. When it is dry (it should only take a few minutes) peel off the masking tape and free-hand, with a small paintbrush, paint in the little stem shoots.
- Now turn your attention to the leaves. Using green acrylic paint, stencil them in the same way as the lemons.
