To create a Web Disk account in cPanel, follow the instructions below:
Procedure:
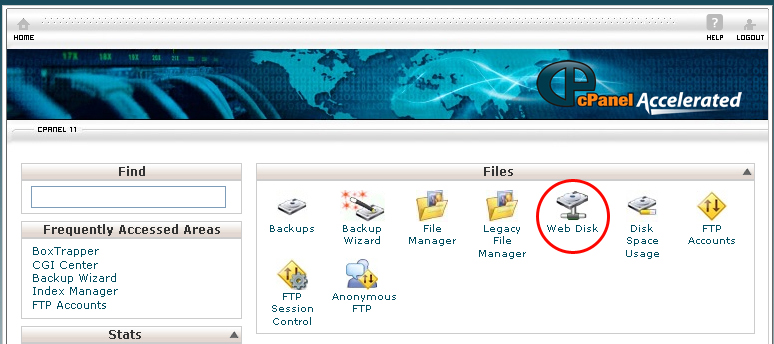
- On the homepage of your cPanel account, click Web Disk Accounts under Files.
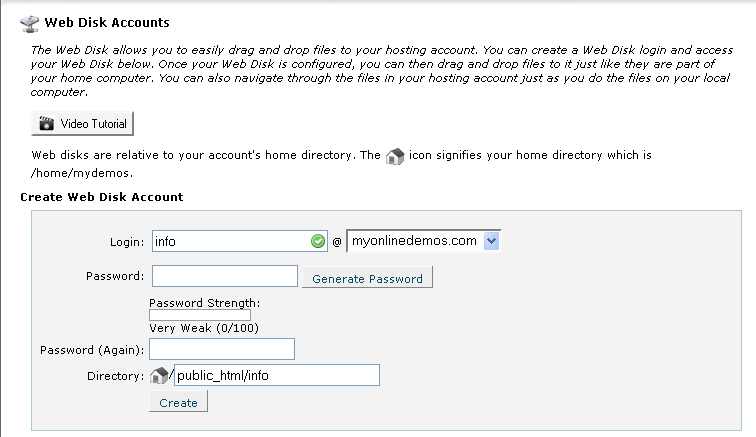
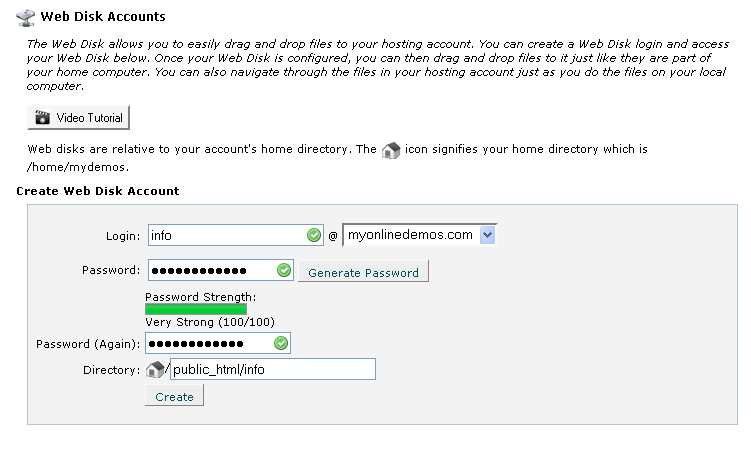
- Select a domain from the drop drown menu
- Enter a login name for the new Web Disk account in the Login text box.
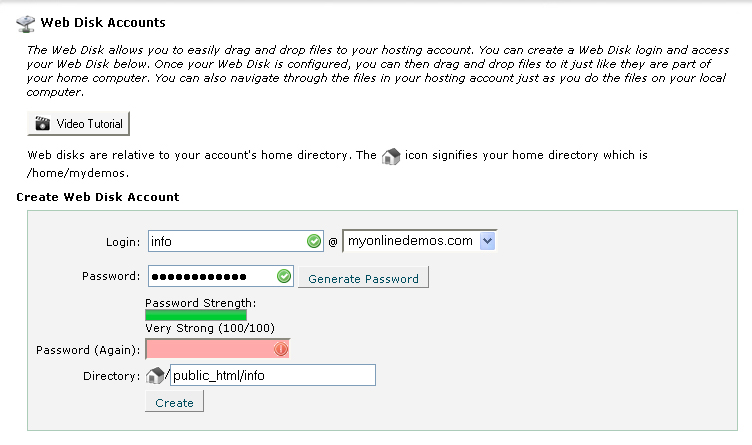
- Enter a password for the new Web Disk account in the Password text box.
- Enter the password for the New Web Disk account again in the Password (Again) text box.
- Specify the directory which you want to access in your Web Disk account. For example, if you want to access to the root folder, Enter public_html. If you want to access only one folder, Enter public_html/foldername. Replace the foldername with the name of the folder inside the public_html.
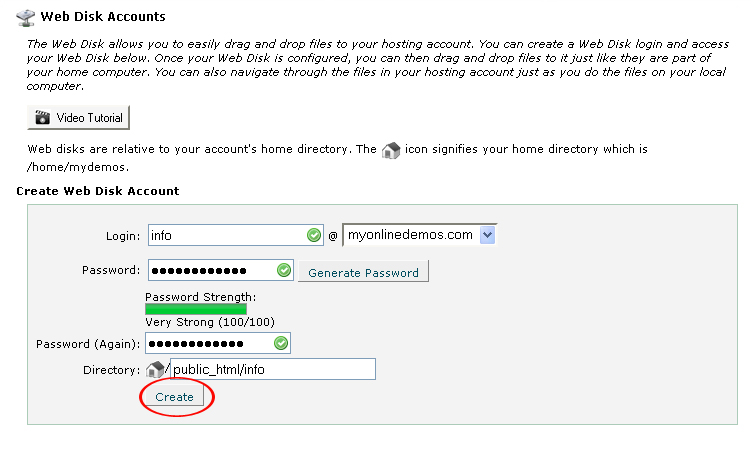
- Click on the Create button.
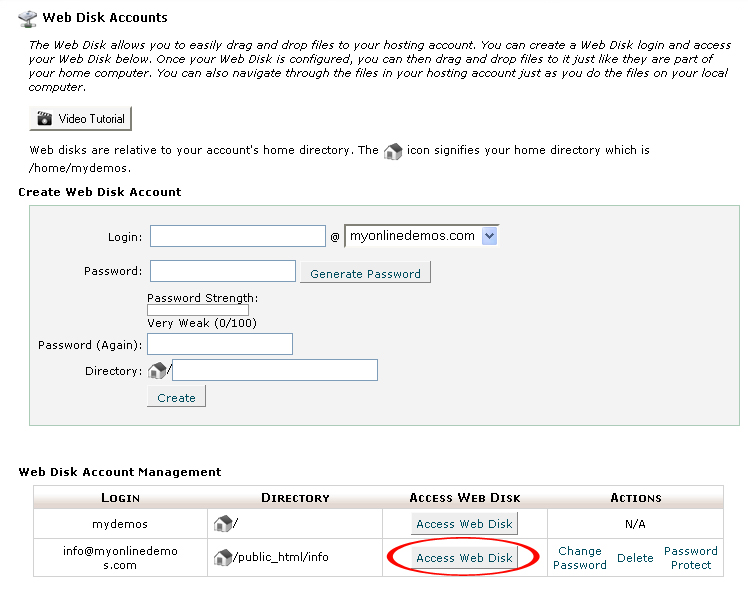
- Click Go Back.
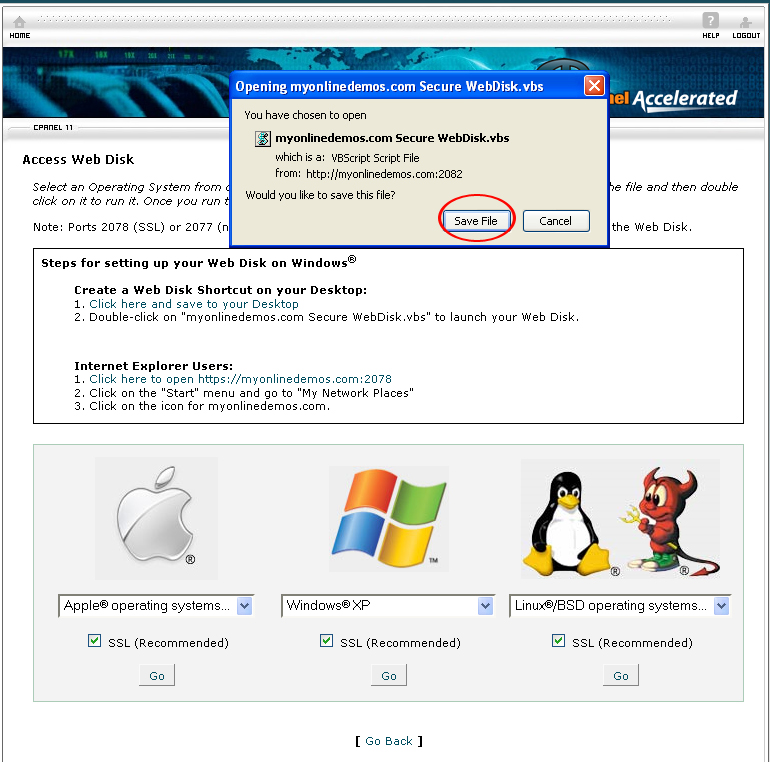
- Click Access Web Disk.
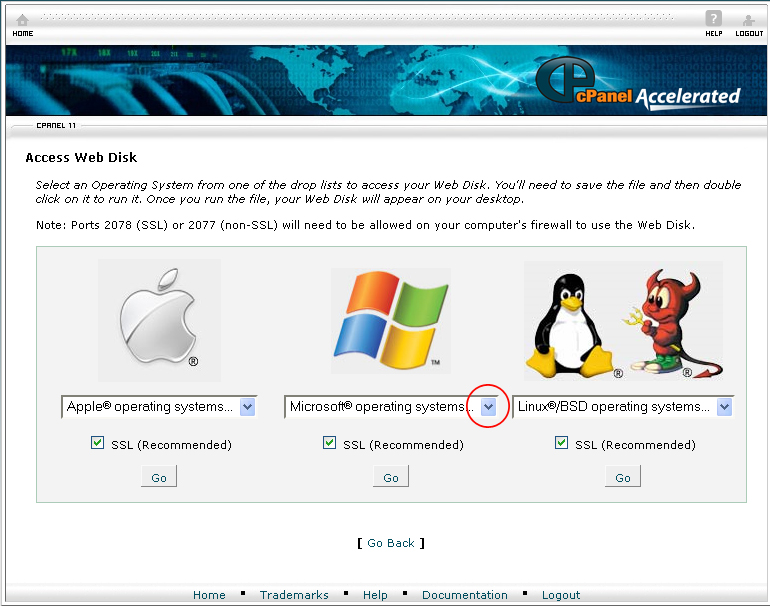
- Depending on your computer, choose from the drop down menu the operating system of your computer.
- A pop up will prompt you to save the Secure WebDisk.vbs file. Click Save File to download it to your desktop.
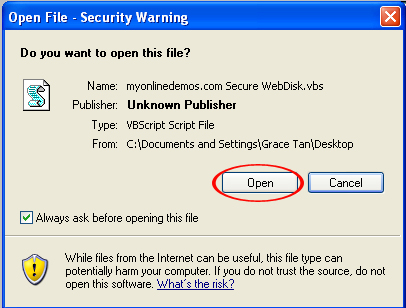
- Go to the desktop and click on the Secure WebDisk.vbs file. A pop up will appear on your screen and prompt you for your confirmation to open the file. Click Open.
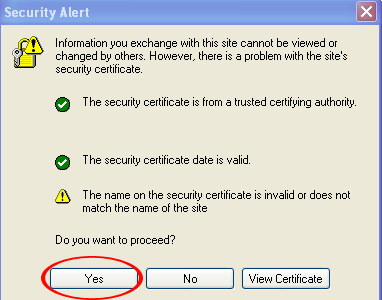
- Next, a Security Alert window will pop up. Click Yes to proceed.
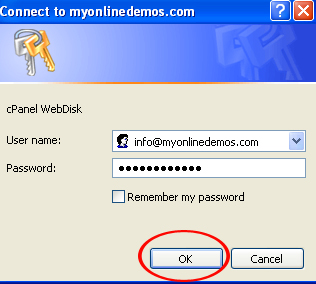
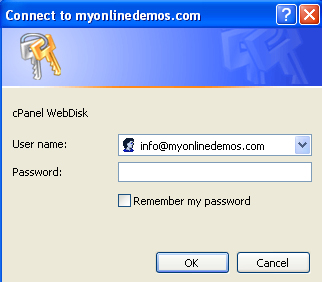
- Enter your username. The username must be entered in a domain format that you have entered when creating the Web Disk account. For example, john@example.com.
- Enter the password. Check Remember my password if you don’t want to fill in the username and password everytime you login.
- A new window will pop up on your computer screen. To upload a file, drag and drop the files to the folder. Alternatively, you can also copy a file and paste it in the folder.
