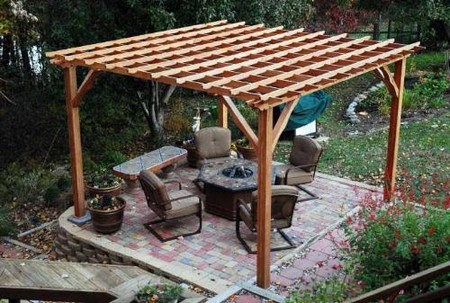
Are you looking to add a little old world charm to your outdoor space? Pergola’s are perfect for this idea. Pergolas were common features of the Italian Renaissance gardens. They covered walk ways and added elegance to spaces. The architectural element that makes a pergola so different is that it puts you inside and outside simultaneously. Today, you can use this pergola construction and design to create a great focal point to your landscape. You can customize the size to fit your needs.
Installing the Posts
Use 4 x 4 pressure treated cores that are covered with 1 x Cedar. You can choose to build on a pad. If you do, secure the posts to the pad with steel based anchors. If you do not build on a pad, use a post that is longer and set them into the ground below the frost line. Lay out the post positions and mark the screw locations. Drive ¼ inch Tapcon screws that thread into 3/16 inch holes to anchor the wood. Brace the posts so they stay plumb.
Attaching the Support Beams
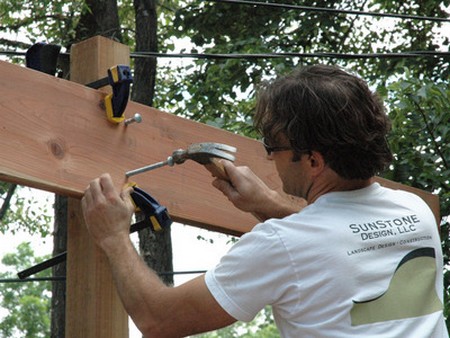
Cut the four 2 x 6 cedar support beams to the right length. Mark the curved notches with the help of a template. Cut the notches with a jigsaw. Clamp all beams into place. Use a level to make sure they are plumb. use a template to mark the curved notches at the ends and cut the notches with a jigsaw. Clamp the beams in place, and check that they’re level and that the posts are plumb. Secure the end with four 3 inch No. 10 screws.
Adding the Crossbeams
Notch the 2 x 6 crossbeams to fit over the support beams. Cut the notches with a table saw (use a dado blade) or use a jigsaw to remove the waste. Make the curved end cuts.
Attach the crossbeam pairs at the posts first. Bore screw holes into the top edges. Screw crossbeams into the support beams
Post Trim and Braces

Cut the post trim pieces to length and width. Notch some of the pieces as necessary to fit between the support beams. Adhere the trim pieces to the posts with construction adhesive and galvanized finishing nails.
Use 2 x 6 stock for the diagonal braces. Cut the length at 45 degrees. Use a flexible stick to lay out the shallow curve on the lower edge of each brace. Fasten the braces to the posts and beams with screws.
Fitting the Top Slats
Cut the five 2 x 4 slats to length and shape all the ends.
Clamp each slat in place. Mark crossbeam notch positions.
Make pilot holes. Attach the slats with 3 inch. No. 10 screws.
Capping the Posts
Cut square blanks. Set the table saw blade to 15 degrees for shaping the bevels.
Use a longer board with a stop on the end as a guide. Clamp the blanks to the sled when making the cuts.
Secure the caps with 6d galvanized finishing nails and construction adhesive.
