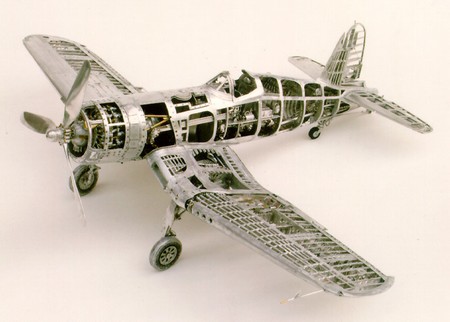
If you enjoy making model planes, here is an idea with a slightly different twist. Try making a plane out of a soda can. The project doesn’t cost much money at all. You can even use your soda can planes to decorate your office, home or ever give them as unique little gifts to people who you know are fascinated with planes. This is the perfect project for you. Here is how you can make an airplane out of an aluminum soda can. Read on for more information.
Items:
- Rivet Gun with Rivets
- Soda Can
- Aluminum Clips
- Wire Coat Hanger
Step 1
Take the tops of six soda cans completely off. Throw the tops in the trash can. Now, slice the aluminum cans vertically and lay out as flat as possible
Step 2
Make six 1 inch by 3 ½ inches slices and two 1 ½ inch by 2 inch wing struts. The longer tabs get bent in half by length. The wings struts get bent horizontally. Press and form the ends in the tabs.
Step 3
Put tabs 5, 1, and 3 into the body of your aluminum airplane. Use tabs 4 and 2 for the tail. In the upright cut a 3×6 inch rectangle for a tailpiece. And, make 3 cuts in the upright.
Step 4
Make the wings of the airplane with two 3 ½ inch pieces. Overlap then to form a 3 ½ inch by 13 inch rectangle. Rivet them. Slice about 2 inches from ends. Put a 1/2-inch crease on both long sides and round wingtips. Puncture the middle wing. Repeat.
Step 5
Construct a 3×7 rectangle. Fold and rivet. Put four ½ inch cuts around the bottom. Make five tabs.
Step 6
Remove the top from two more soda cans. Make three cuts along the side to make room for the three flaps on the tail and the two cuts serving as the tail rest. Put them together. On the can number two, make two 4 inch cuts an inch apart. Puncture the can put in the wings. Make cuts for the short wing struts. Make cuts for wheels struts, too. Put together.
Step 7
Put the airplane together.
Propeller and Wheels
Step 1
Puncture holes in the middle of four can bottoms. Join two bottoms together pressing the outer rim of one around the other. Repeat.
Step 2
Cut the hanger to about seven inches. Make a 3×5 inch rectangle, put the hanger inside then fold.
Step 3
Slice the next can in half. Leave the bottom. Put cuts 1 inch apart around the perimeter. Bend a tab to construct the propeller. Rivet.
Step 4
Put wire hanger through holes. Curve to make the hanger.
