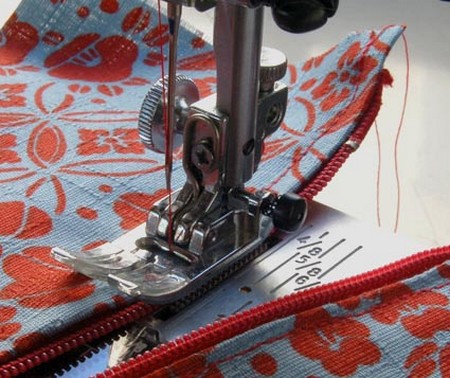
Sewing the zipper seems to be most tedious part to put the clothing item together but should not be case where you know exactly how you can to do it. Using a sewing machine, sewing the zipper is very fast and also easy. Here is a guideline that you can follow.
Procedure:
Select an appropriate zipper. Kind of the zipper to use will depend on your project. At instance if you are going to work on the denim or on any other heavyweight clothing or garment you may also need to choose the metal zipper. Plastic zipper works in all kinds of the fabrics. The zipper color must match the color of fabric and the same applies to thread also.
- Familiarize yourself with zipper foot. If it is your first time using the sewing machine to attach the zipper then most important thing you must do is to be much familiar with zipper foot. Most of sewing machines come with the zipper foot. Its job is allowing you to sew zipper at a very closer angle thus it prevents any wrinkles in zipper.
- Now baste the zipper. Basting is very necessary in keeping zipper in place when you stitch. While basting, turn fabric right side out to put zipper on top of seams, with its front side lying down. Then run the basting stitch using sewing machine along sides of zipper. As you are basting make sure of pressing flat the zipper in order to smooth out any of the creases. You may also use pins to baste. Put one pin on the either side of zipper and one the on top.
- Then start sewing. When you are done with basting you may begin to sew the zipper. As you sew down, keep zipper closed in avoid making the creases. Keep fabric on right side out and start at one side of zipper with sewing from top down to bottom of zipper. While reaching the bottom gently lift zipper foot to move fabric to one of sides. Then bring zipper foot back to down again so that you may work on bottom of zipper and then stitch one straight line at all the way towards other end. Raise zipper foot again and at this time sew other side of zipper, starting from top to bottom.
- Remove basting stitch or pins. While the zipper is been already sewn in a place you may remove basting stitch or pins. Do this carefully to avoid damaging of the permanent stitches.
- Now test the zipper. Gently try to unzip zipper and look that if it was securely stitched at place. To ensure, it stays in its place, run it about three or four stitches along its sides and also at bottom of zipper.
- You cannot perfectly do this at your earlier attempts so you have to run tests before working on clothing project. While you have already mastered in sewing a zipper you may fix all your own clothes also perhaps do with your own and having that sewing ability will save you a hefty amount of money.
