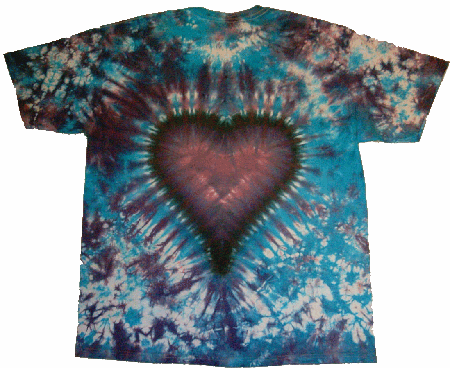
Tie and dye attire was a striking popularity in the sixties and seventies. Tie and dye shirts are an attraction for students and vacationers till date. Making tie and dye shirts is a very simple process and can be done very easily by anyone and everyone.
You don’t have to have artistic capabilities for making tie and dye shirts. Some materials, a little bit of spare time, and willingness are more than sufficient for you to succeed.
Things needed are:
- Plain white shirt
- Plastic tablecloth
- Fabric dye(s) of desired colour(s)
- Fixer
- Bowls or condiment bottles
- Rubber bands or string
- Plastic wrap
- Salt
Set-up a clean working place: The process of tying and dyeing can be very untidy and messy, as you can end up spreading dye everywhere. It is thus important to select a work area where there is minimum possibility of you to stain your furniture, tapestry, etc. Preferably, select a flat surface like a table. Cover your working area with a plastic table cloth. Wear an apron or work clothing, so that you don’t end up staining the clothes you are already wearing.
Select a plain white shirt as the effect would be best on one. Select a cotton shirt, preferably pre-shrunk, as this will prove to be very absorbent.
Preparing the dye(s): You may dye the shirt with a single colour. However, if you want to unleash your creative side, try using more than one dye. Make at least two-three dyes ready for use at one particular time. For preparing dyes that are in powder form, follow instructions on the packeging for the amount of water required. In case of liquid dyes, pour them out in bowls. For squeezing out the dye, fill condiment bottles with the dye.
Tying and dyeing one part: For this process, collect a part of your shirt and tye it using rubber bands or strings tightly and randomly. The tyed portion is then dipped in the dye. The portion of the shirt where bands or strings cover the shirt will not absorb the dye, thus giving rise to randomly shaped patterns. Dip the tied portion of your shirt in the bowl in case you are using them. If, instead, you are using bottles, squirt dye on the tied portion.
Completing the tye and dye: After the first potion, repeat the steps for the whole shirt. Tye different portions seperately and dye them. Make use of different dyes to colour different parts for a multi-coloured shirt.
Letting the dye set: Once the process of dying is over, put the shirt in a zip-lock bag. Place the bag in a freezer overnight. Next morning, fill a tub or bucket with water. Dissolve as much salt in the water as possible. Add some drops of the fixer. The fixer ensures that the colour of the dye stays after subsequent washes. Submerge the dyed shirt in the water tub for an hour. You can now wash your shirt in the laundary like any of your other shirts.
Tying and dyeing shirts involves many different techniques. You may also tie the entire shirt and dye it for a uniform colour and design. You may even tie portions of different sizes to get large designs in some areas while smaller in the others. So go, tye and dye and show your creativity.
