It is difficult to capture the wide expanse of a landscape in a single picture. If you stand some distance away in order to get everything in, the elements of the scene will appear too small. If you stand too close, the reverse happens. For such scenes, it is better to capture sections of the landscape in a few shots and then merge them together in Photoshop Elements.
- Select [File]-[Create Photomerge] from the menu bar. In the Photomerge dialog box, click [Browse].
- When the Open dialog box appears, open an image. Hold down the Shift key and select all the pictures in the folder.

- Click [Open]. The files will appear in the Source Files window in the Photomerge dialog box.
- Click OK to open the files and execute the Photomerge command. The program will automatical¬ly analyze the image data of the overlapping areas between the pictures and merge the pictures into a panorama. Note that the center piece is in the wrong position.
- Click on the Select Image Tool in the Photomerge dialog box. Click and drag the center image to the right.
- Check the Advanced Blending option under Composition Settings on the right of the [Photomerge] dialog box to blend the edges of the pictures. Click [Preview].
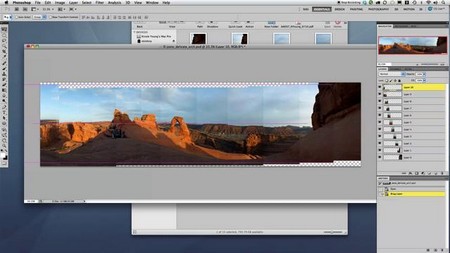
- Click OK to complete the photomerge. The panorama appears in a new window.
- Select the Crop Tool from the toolbox. Select the image, leaving out jagged edges