There is quite a difference between sanding bare wood and ‘rubbing down’, ‘cutting’ or ‘flatting back’ between coats. Apart from where you are removing blemishes, always work from coarse to fine; for raw wood range from 100 to 120/150 to 240/320 grit. Final sanding on a top coat can require 600 grit wet and dry, if you have the patience. Do not skimp on sanding – no-one ever got a perfect finish without meticulous attention to it.
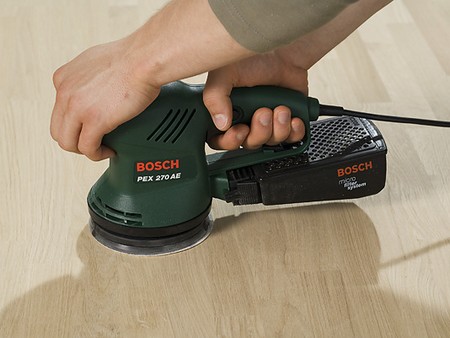
Machines take a lot of the hard work out of a potentially boring job, but sympathetic hand-sanding is always necessary at the last stage. A belt sander worked diagonally across the grain then along it cuts a rough surface like new pine very quickly; a hand block also works well like this, but you will give yourself extra work if the surface is already quite smooth. Orbital and finishing sanders are safer, if slower, than the belt machines although the tiny circular scratches can be a bugbear. Get a machine with dust extraction, or stop every minute or two to brush the dust off.

The question of ‘cleaning off before you stain and finish is a vital one. Wipe the work over with white spirit or, best of all, use a ‘tack rag’ – a soft cloth soaked in water, the finish you are using, and its solvent, then squeezed out. The dust adheres to the stickiness of the rag, rather than being pushed around on the surface.
‘Between-coat’ sanding is a matter of flattening ridges and imperfections, removing dust stuck in the coat, and providing a ‘key’ for the next layer. Use the finest grades of garnet or wet and dry paper, lubricated with water or oil. The sludge created is itself an excellent abrasive. Use your fingertips to judge the results, and look along the surface in angled light.
Steel wool is used for stripping awkward areas, a fine cut between coats, and – lubricated with wax or oil -burnishing the final coat. The finer the scratches, the smoother the finish, until it gets to the point where you are creating a gloss, not dulling it.
Car polishes are good for final perfection and durability, but they do contain silicon; pumice or rotten-stone powder, applied with oil by felt pad, will get the last specks out of your satin finish, and applied dry and very lightly with a ‘dulling brush’ (furniture rubbing brush) will bring a high-gloss finish down in brilliance.
In these super-fine stages, be careful about the direction of your movements. It is tempting to assume that the abrasive is so fine that you can rub round in a buffing action, but even those minute scratches will reflect light in different directions and you will see them as marks, so stay in parallel lines with the grain.
If you are doing any refinishing you will certainly be using wood stains, and if you are making new items from scratch, sooner or later you will want to alter the colour of the wood in some way. You need to know the best stains for your particular needs; terms can be confusing, in that an ‘oil’ stain has a (usually naphtha) base, soluble in white spirit (paint thinner), while a ‘spirit’ stain uses not white but methylated spirit (wood alcohol) as its solvent medium.
You might want to enliven wood, deepening and enriching the colour; to emphasize the ‘figure’, or pattern of the grain; to give, say, new mahogany the characteristic rich red brown of antique furniture – to make any new wood look old, in fact. You might need to match new repair wood to the colour of old existing parts, or want to disguise a wood entirely, giving inexpensive pine the appearance of much dearer timbers like oak. Stains do all of these, and always have.

Whatever stain you are using, for whatever purpose, never do it without testing first.
It is important to know when you are using stain that different woods absorb at different rates, and that parts of the same piece of wood will behave differently. Be aware, when you are dealing with furniture with curved components, or staining a banister, for instance, that absorbency differs as the grain meets the surface at a constantly varying angle. There is nothing so annoying as uneven patches in a piece over which you have taken a lot of care.
Careful preparation is vital. Allow more time than you think you need, and if you are mixing to match, make more than you think you need, rather than be caught with too little to finish the job. Pay particular attention when sanding to patches of grease or old finish, which collect in the awkward corners where you cannot get them off, but which show up disproportionately when you apply the colour. Be patient!
Water, oil and spirit are all used to carry the two basic colouring agents – pigments, which do not penetrate deeply, and dyes, which do. There is no stain to lighten wood – for that you must use bleach.