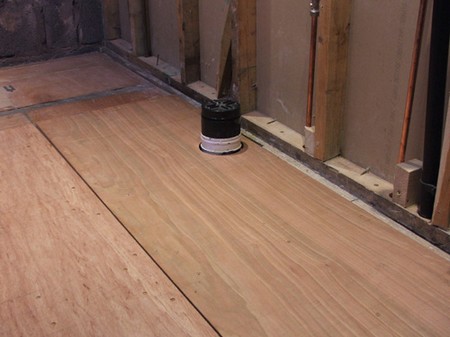
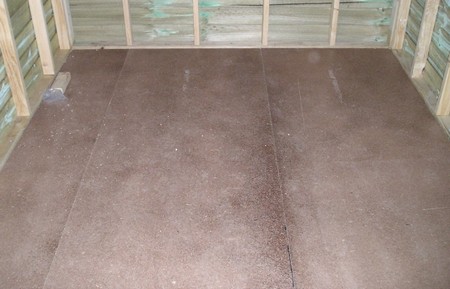
Chipboard sheet flooring requires few repairs, unless it gets damp or if you need to make an inspection hatch for access to wiring or pipes. Because the large sheets are tongued and grooved, they are quite difficult (but not impossible) to remove once they are down.
You may also find that a chipboard floor can flex if additional timbers were not fitted between the joists to support the edges when the floor was first laid.
REMOVING CHIPBOARD (PARTICLE BOARD)
To remove a whole chipboard panel, you will first of all have to cut round all four edges to remove the tongues, using a circular saw set to just less than the thickness of the board, so that you do not damage the joists or any electric cables/pipes underneath. Then either undo the screws or punch home the nails before lifting the old board. Cut the tongues off the new board before re-laying it and fill the gap left with wood filler.
To cut out a section, find the location of the joists with a joist and batten (furring strip) detector (existing screws or nails will be a guide). Then use a circular saw to make two cuts alongside the edges of adjacent joists (or joists spaced two apart for a larger inspection hatch or more extensive damage), with two more cuts at right angles to square off the panel. Remove any screws (or punch home any nails) within the panel and lever it out. Before fitting a new section, screw support battens to the sides of the joists and, if possible, cross battens between the joists to support the edges. If any edges are left unsupported, screw battens to the underside of the chipboard surrounding the hatch (screwing through the chipboard into the batten) to provide adequate support for the cut-out section.
Where chipboard flooring might get damp in the future, seal the surface and all cut edges with PVA woodworking adhesive.
FITTING NEW CHIPBOARD (PARTICLE BOARD) FLOORING
Make sure that any chipboard you buy for flooring is flooring grade. This comes in two thicknesses – 19 mm and 22 mm; use 19 mm for joists spaced less than 450 mm (18 in) apart.
Both square-edge and tongued and-grooved chipboard flooring is available. The advantages of tongued-and-grooved are that the edges meeting at right angles to the joists will support one another and that it will prevent draughts. On the other hand, it is more difficult to get up in the future.
Chipboard flooring is sold in large sheets 2.44 x 1.22 m (8 x 4 ft) and can be positioned on the floor so that the edges on the short side of a sheet meet in the centre of a joist. Smaller sheets are sold for boarding over lofts.
Start at one side of the room, leaving a gap of around 10 mm between the wall and the grooved edge of the sheet (remove all skirtings/baseboards first). Screw the sheet to the joists, spacing the screws at about 300 mm (12 in) intervals and going into every joist. Drill clearance holes in the chipboard first and then make a countersunk recess – a cordless drill/screwdriver will make the whole job much easier. Position the second sheet so that the short edges do not line up and work around the room, finally cutting sheets to fit around the edges. Where there are pipe joints or electrical accessories below the floorboards, cut out an inspection hatch and fit supporting timbers below. For each board, use an off-cut of sheet with a groove along one edge plus a mallet to hammer home the sheet you have just laid. This will prevent any accidental damage.
To cut chipboard, use a circular saw fitted with a tungsten-carbide tipped (TCT) blade -ordinary blades will blunt quickly and handsaws even sooner.
LEVELLING FLOORS
If a wooden floor (floorboards or chipboard sheeting) is basically sound and dry, but is a little uneven, you can ‘screed’ it before fitting some kinds of floor covering (especially carpet, and thin sheet materials) in order to provide a smooth level surface.
The easiest material to use is hardboard sheeting laid rough side up. Like chipboard, this comes in large sheets, but it is relatively easy to cut with a sharp trimming knife and smaller sheets are available if required.
The hardboard sheeting should be left in the room where it is to be installed for a couple of days before putting it down (so that it takes up the temperature and humidity of the room). Nail it down to the floorboards using special hardboard nails around 150 mm (6 in) apart, making sure that the head of the nail is hammered flush with the hardboard surface. Remember to leave access panels where necessary.
As an alternative to hardboard, 6 mm plywood could be used, secured to the floorboards or chipboard floor with countersunk screws. Although a more expensive solution, this will give a more rigid result; on very uneven floors, hardboard will tend to take up the profile of the surface underneath over a period of time.
Where a floor is not level – as opposed to being uneven – it might be necessary to use the kind of floor levelling compound used on solid floors after covering the existing flooring with hardboard. This might be necessary when laying coverings such as woodstrip flooring or parquet in an older house where the foundations have sagged, giving a ‘lean’ to the floor, and might be a better bet than taking up the existing floor and re-laying it.
Coverings like carpet and vinyl do not need to be level (though they must be laid on a flat surface) and if you feel that a leaning floor gives ‘character’ to thefiouse, it would be best to leave it that way, simply covering it with hardboard to get the necessary smooth, flat (but not level) surface.

