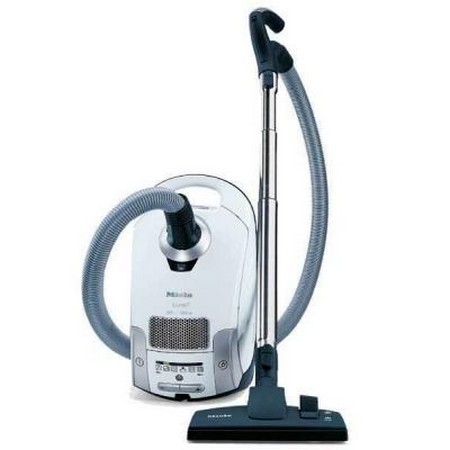
When’s the last time you hugged your vacuum cleaner? Vacuums have become such a vital part of the appliance closet that it’s difficult to imagine life fifty years ago when the vacuum wasn’t in every home. Today’s vacuum hasn’t evolved much from earlier versions, except that the new models are lighter in weight and more trouble-free. However, they still break down. Fortunately, you can easily fix most problems in a few minutes or, at most, a few hours over a weekend here are some shop vac reviews.
VACUUM CLEANERS
Vacuum cleaners are of two general kinds: the horizontal, and the upright. Upright vacuum cleaners don’t pick up dirt when the cleaner nozzle is either too close or too far from the surface being cleaned. Many types of upright cleaners have nozzle adjustment screws. Turn the screw until a 25-cent piece will slide easily between the nozzle and the floor surface. For upright cleaners with revolving brushes, space between nozzle and the floor should be equal to the thickness of a half dollar (if you can find one).
Occasionally, the belt that causes the brush to revolve might be either broken or loose. Check the belt to see that it’s firmly set around both brush and motor shaft. Clean all string, hair, and other dirt from the belt. If it doesn’t work after cleaning and adjusting, replace it.
VACUUM MOTORS
There are three general kinds of motor troubles: the motor won’t start; it runs hot; or it runs slow. Any of these troubles may be due to an inadequate or defective power supply, to unoiled or dirty parts, to defects in the wiring of the motor itself, or to the belt connection if there is one.
If a vacuum cleaner or other appliance doesn’t work, first test the cord and plugs, and the wall outlet to which the vacuum cleaner is connected. Then check the circuit breaker or fuse that controls the outlet. Only after these parts have proved to be in working order should you inspect and repair the vacuum itself.
Oiling will usually cure a motor that runs too hot or slow. Unsealed motors, and those for which manufacturer’s oiling instructions are provided, require an oiling at least once a year. Following are tips on oiling: Never tamper with motors sealed in metal housings; they are self-lubricating. Never apply oil to parts of a motor unless the opening in which you pour the oil is clearly marked “oil,” or unless a lubrication chart accompanies the appliance. Oil in the wrong place might ruin a motor. Don’t oil too frequently; manufacturer’s instructions usually specify the grade and type of oil, and the frequency of oiling.
Clean motors every year, particularly those in appliances exposed to dirt and grease. Every month or so you should clean the motor’s open windings, exposed bearings, and other visible parts with a dry, clean cloth or a soft-bristled brush. With some vacuum models, you can clean the motor with the small attachment of the vacuum itself.
You will sometimes need belt adjustments to maintain larger fractional-horsepower motors or combination vacuum/polisher units. To keep the belt in good running order, keep oil and grease off both belt and pulley, and wipe them clean frequently. Don’t use belt-dressing substances on rubber V-type belts; they will actually weaken the rubber. In most cases, there will be some type of adjustment on the machine for loose belts.
TROUBLESHOOTING
Following are some of the more common problems that vacuum cleaners develop, and ways to repair them. For some of these issues you may require replacement hoover vacuum parts, and if so you’ll have to wait for them to arrive.
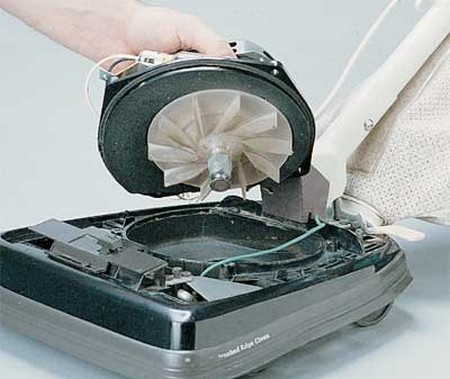
If the motor won’t run, check the circuit, line cord, and switch. Then check all internal terminal blocks with a continuity tester and tighten any that are loose. Finally, test the motor (or have it tested for you), checking the brushes, armature, and bearings.
If the motor stops and starts, check the line cord for an intermittent break. Also check for loose connections within the switch and unit. Locate and repair any bare wire that is shorting out against the metal casing.
If the motor runs too slowly, the bearings might be dry or the fan jammed. Lubricate or replace as needed.
If the motor sparks, the commutator might be dirty. Clean with trichlorethylene and sand down with fine sandpaper. The brushes might be worn out, requiring replacement. Also, the armature wire might be open and require repair or replacement.
If suction is weak, check the hose and attachments to make sure there are no leaks or breaks. Also check to see if there are obstructions in the hose that need to be cleaned out. Check the vacuum bag and seal to make sure that a full vacuum is being formed within the unit. The bag might just be full and require replacement. Replace the bag or seal as needed. Also check to see if there is a nozzle setting that is incorrectly adjusted.
If dust leaks into the room, the bag might simply have a hole or be installed incorrectly. Replace or reinstall the bag. Also check the sealing gasket; replace if worn or broken.

