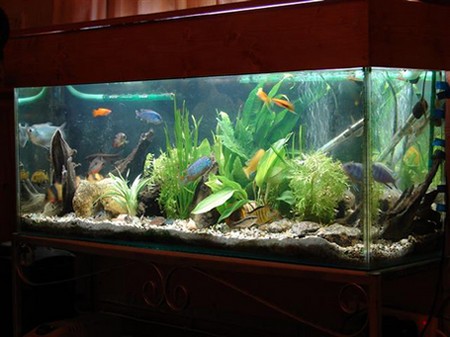
Once the aquarium is in position, and you have checked that it is correctly level and prepared the substrate and decor, you can move on to the next stage. The easiest way to proceed is to partly fill the tank, then position the plants and make any other adjustments, before you finish filling the tank with water. If you are using an external pad heater, place it beneath the tank before filling, or attach it to the back at a later stage.
Adding the heaterstat
First check that any rocks are in position and supported before adding the heaterstat, otherwise it could be damaged accidentally. Heaterstats are supplied with rubber suckers which need to be moistened so that they fix to the side of the tank. Locate the supports so that they do not fit directly round the heating element within the glass tube. Arrange the suckers so that they hold the unit firmly to the glass, taking care not to alter the calibration of the thermostat. Never switch on this kind of unit until the tank has been filled with water.
If you need more than one heaterstat, space them evenly around the tank to ensure good heat distribution. Set the unit or units horizontally rather than vertically, otherwise the heated water will rise up directly past the thermostat, switching it off prematurely.
Certain types of fish may lay their eggs on the heater, but you can prevent this by encircling it with a tube of plastic mesh, without inhibiting the circulation of water. Do not allow this protective cover to come into direct contact with the heater, and fix it in such a way that you can easily slide it off for cleaning.
Filling the aquarium
To fill the tank, the ideal container is a plastic watering can, with a graduated scale. This is useful for calculating how much water conditioner to add, removing harmful chlorine or chloramine. When making partial water changes, you must treat the water before adding it to the tank, of course, but initially you can wait until the aquarium is full, because there are no fish in it yet.
Planting
Add the plants once the tank is about a quarter full. If you are including real plants, make sure that the water temperature is roughly at the level you plan to maintain in the aquarium. Do not let the plants dry out at any stage – if you cannot set them in the tank at once, keep them under water until you are ready. If planting cuttings, keep them in clumps, allowing space between the individual sections for growth; a pencil is a useful tool for preparing holes of the right size.
When positioning potted-up plants, you will need to excavate a larger area of gravel for them, and you may need to bank up the substrate to conceal the pot. Another tip is to position the pot behind rockwork or bogwood to hide it.
Handle the plants as little as possible, to avoid damaging their leaves or stems. If using fertilizer pellets, bury these alongside the plants once they are in position. Put in any floating plants at a later stage, once the aquarium is full.
Air matters
At this point, carry out any other adjustments, such as altering the uplift pipe of the undergravel filter. This may be necessary if you want to fit a powerhead at the top, to ensure better circulation of the water. If the uplift is too tall to accommodate the powerhead, you can cut it down to the right length with a hacksaw.
If you are including an airstone or similar device, place it in the tank at this stage, with a multiple ‘gang valve’ fitted into the tubing line, to protect the air pump.
Fillers and filling
If using an internal power filter, fit it at this stage, usually at the rear. The water outlet at the top is normally directed along the tank for good water circulation, although it can be angled across the tank if preferred. The unit may be totally submerged, but more often, the actual outlet is positioned level with the water surface.
An external canister filter is not incorporated into the tank, but it is easier to fit the outlet tube now, just above the substrate. The filtered water can then be run back into the tank from above, via a spray bar for example.
Once everything is in place, add the remainder of the water to fill the aquarium to just below the level of the horizontal glass bars at the top. The next stage is to sort out the covering and lighting, before connecting up the electrics and switching on all the equipment.

