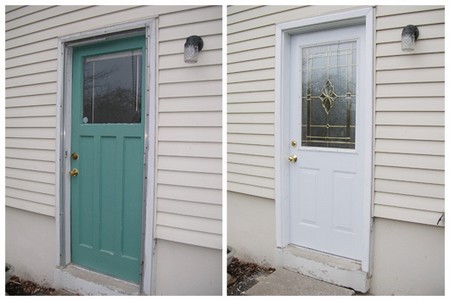
The first job is to remove the existing door from the frame without damaging the frame or the hinge recesses do this very carefully, using small wood wedges to take the weight of the door.
Carefully check that the jambs of the door frame are firmly fixed and reasonably straight. If the frame is loose, it should be refixed before hanging the door. If the stops are loose, they can be removed and refixed later when the door has been hung and latched. Any twist or excessive bend in the frame will hinder and complicate successfully hanging the door. Check that the hinge side of the door frame is more-or-less vertical – use a spirit level. It is not quite so important for the other side to be vertical you can shape the door to fit. See page if you will like to order a custom made door.

Check the location of any lock block and hinge blocks. With panel doors it may be necessary to cut off the horns on the ends of the stiles – use a tenon saw. The horns protect the corners of the door, until it is ready to be hung. For external doors, coat cut surfaces with preservative unless the wood is naturally durable.
Hold the door in position to see how well it fits in the door frame. The best way of doing this is to push the door against the hanging side of the top of the frame and to support the door in this position with the wedges.
Mark the position of the door on the frame, transferring the position of the hinges on the frame on to the door. Remove the door and then transfer the measurements to the door itself. Remember to subtract about 2 to 3mm for clearance all round to allow for painting the door and leave sufficient gap at the bottom for the door to clear carpets and uneven floors. When cutting off a lot, manoeuvre the door so that the amount to be removed can be shared between both sides and the top and bottom but if you cut anything off the hinge side, make sure that it is still vertical.
Plane the edges of the door to the lines previously marked out if you have to cut off a lot, try sawing first. On the top and bottom rails, work from the ends inwards. Always make sure that you do not take off so much material that you affect the intended appearance of the door. If the amount you want to remove from a flush door is greater than the thickness of the lipping, remove the lipping, take off the required amount from the door, and replace the lipping. This needs a lot of care. If it looks as though you will have to plane off a large amount of limber from one stile of a panel door, readjust the door so that equal amounts can be planed off both stiles this will give the door a balanced appearance.
To allow the door to close easily, the swinging side – opposite the hinge – may be bevelled a small amount on the closing edge.
Check that the door fits into the frame with the required amount of clearance.
Place the door in the frame with the gaps at the top and bottom. Hold it in place with the two wedges and square the lines of the existing hinge recesses on to the edge of the door. Check that the marks made earlier are still correct before you do this. If you do not intend to reuse the original hinges, or identical replacements, you will need to make new hinge positions on the frame as well as on the door. Use large hinges rather than small ones.
Square the lines across the edge of the door. Mark out the width and depth lines for the hinge recesses make sure that the knuckles of the hinges are just clear of the edge of the door. The best tool for this job is a marking gauge.
Cut out the recesses for the hinges in the door with a broad chisel and mallet, making the recesses as deep as the hinges themselves. Check the fit of the hinges in the recesses on the door and the frame.
Position the hinges in the appropriate recesses in the frame and mark the centre screw holes. Remove the hinges and use a bradawl or drill to make holes of sufficient size for starting the screws.
Locate the hinges in the door recesses and fix them in position with one centre screw. Using a rule as a straight-edge, check that the hinge pins are parallel to the edge of the door. Insert the remaining screws into the hinges.
Hold the door in position against the frame by using wedges (and a helper). Locate the top hinge into the recess in the frame and insert the screw into the previously made hole. Repeat this operation with the bottom hinge.
Try the door to see if it swings easily and closes properly without catching the frame at any point. If it does not and there is sufficient clearance all round, you have probably recessed the hinges too much or too little – so you will either have to take off more or pack the recesses (with bits of cardboard, for example).
When everything looks satisfactory, put the remaining screws into the hinges.
Tools and materials for the job Tools Brace and drill bit, bradawl, hammer, mallei, marking gauge, pencil and rule, plane, saw, screwdriver, try square, wood chisel (19 or 25mm).
Materials Two or three steel or brass butt hinges (100mm), 30mm countersunk steel or brass wood screws (8 or 10 gauge), two large wood wedges and some small wood wedges, door.