The new rave of the video game world is the Nintendo Wii. Nintendo is changing the way people game with their motion sensor controlled system. You can increase the fun by connecting your Wii to the internet. You can increase the usage of your Wii by using it to surf the web, receive updates and downloading other games like those you can learn at wazmagazine.
Things You’ll Need:
- PC running Windows XP
- Nintendo Wi-Fi USB Connector
- Connect a Nintendo Wii to the Internet through a Wireless Router
Step 1
Turn on your Nintendo Wii by plugging it into the nearest power source. Press the power button on.
Step 2
When you come to the warning screen press the ‘A’ button.
Step 3
On the main menu select “Wii” button. It’s in the left hand corner. Use your Wii remote to move the cursor (shaped like a hand). Now, press the “A” button on the controller to select the Wii options.
Step 4
Select the Wii settings box located on the right.
Step 5
From the left arrow to see options. Then choose ‘internet’ from the list. Go to ‘Connection Settings’.
Step 6
Select ‘Connection 3: None’ option. Then, choose the ‘Wireless Connection’ option and then the ‘Search for an Access Point Option’.
Step 7
Select the access point you will use from the list. Save the settings by clicking ‘Ok’. Then choose ‘ok’ to test your connection.
Connect a Nintendo Wii to the Internet with a Wii LAN Adapter
Step 1
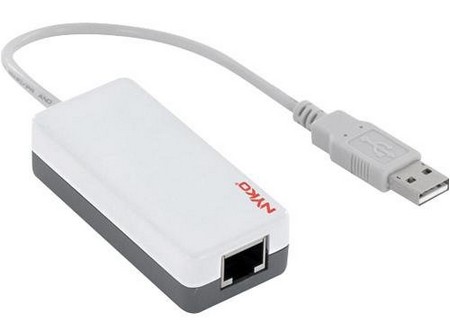
Put the Wii LAN adapter into the USB port. This port is on the backside of the gaming unit.
Step 2
Connect the ethernet cable from your modem/router to your adapter.
Step 3
Power on the Wii unit.
Step 4
Select the “Wii” options button. Then, choose the “Wii Settings”. Scroll the list options and pick “Internet”.
Step 5
Choose “Connection Status,” then “Connection 3: None” and “Wired Connection.”
Step 6
Press “OK” to initiate the connection test. You are connected.
Connect a Nintendo Wii to the Internet through a PC
Step 1
Use the CD that came with the Nintendo Wi-Fi USB Connector into a PC running Windows XP that is connected to internet. A the setup window click “OK” to begin installing.
Step 2
Pick the language setting. Press “Ok”.
Step 3
When prompted place the connector into a USB port.
Step 4
Press the registration tool option on the Windows task bar.
Step 5
Power on the Wii unit. Click “Wii” options button. Choose “Wii Settings”. Choose “Internet” from the list of options.
Step 6
Select “Connection Status,” then “Connection 3: None” and “Wireless Connection.” Choose “Nintendo Wi-Fi USB Connector” from the options list, then “Next” to continue.
Step 7
Your Wii is listed in the Nintendo Wi-Fi USB Connector Registration Tool window. Click on the Wii’s name and select “Grant Permission to Connect.”
Step 8
Click “Next” for the setup completion window, and then click “OK” to run the connection test.
