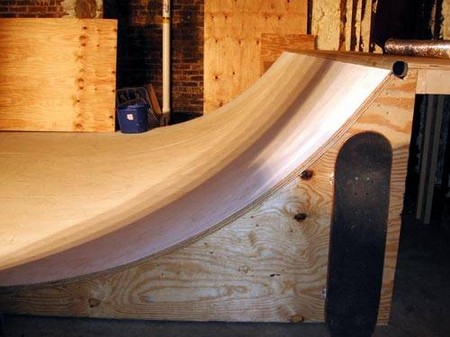
Building a skateboard ramp is a good way to practice and improve your skateboarding all around. You can use this ramp in various places. It can be used in your driveway, in the street or at a friend’s house. This skateboard ramp is so easy to assemble it came be easily stored and put away. You can move it just about anywhere. You can make a mini skateboard ramp out of simple materials like plywood and 2 x4 planks. All it takes is a little construction know how. Here is how you can build your very own skateboard ramp. Continue reading below to find out how.
Difficulty: Challenging
Instructions
Things You’ll Need:
- Wood Screw
- ¾ inch Plywood
- 3/8 inch Plywood
- 2×4 Boards
- Skil Saw
Planning
Step 1
Determine the plan you will use for your skateboard ramp. You can purchase and inexpensive plan to make your own skateboard ramp, research on the internet for a simple one, or draw your own.
Step 2
Determine how big your skateboard mini ramp will be. Most mini ramps don’t measure over 8 feet in width. They should also measure slightly more than 2 feet in height.
Step 3
Start in a big workspace. Bring your skateboard plan and any tools need to get started.
Constructing the Side Panels
Step 1
Use a piece of ¾ Plywood. Place it on a level surface. Draw a line on the right side that is approximately 24 to 28 inches. This measures the tallest part of your skateboard ramp.
Step 2
Draw another line of the left side of the plywood board. It should measure approximately 3 feet. This is the deck portion.
Step 3
Mark the bottom part of the new ramp with a straight line. This is the lower portion of the skateboard ramp. The measurement should be approxiamtely 5 feet.
Step 4
Use a curved line to join the top of the deck with the bottom. You can use a half circle drawing tool to help you with accuracy in this step. The curve needs to be accurate.
Finishing the Skateboard Mini Ramp
Step 1
Use a Skil- Saw to slice down the lines you have drawn. This will ensure that the curves are nice and smooth.
Step 2
Repeat this on another section of plywood for the other part of the ramp.
Step 3
Use 2 x 4s to join the two sides together. Take care not to space them too wide. They need to fall at regular intervals so they can give enough support to the skateboard ramp.
Step 4
Take a single layer of 3/8-inch plywood for the actual mini-ramp section. Bend it in an arc to be placed over the curve.
Step 5
Finish and smooth the rough edges.

