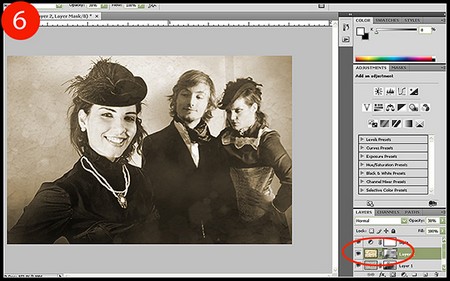
Old photographs evoke nostalgia and seem more precious because of their fragility and the fact that the memories they capture are of a distant past. You can imitate the faded look of antiquated photos in your images by desaturating the colors, adding hair and dust particles, and blending the effects together in Photoshop Elements.
- Open a family portrait image.
- Select [Filter]-[Texture]-[Grain] from the menu bar. In the Grain dialog box, set Intensity to 12, Contrast to 13, and Grain Type to Vertical. Click OK to add fine vertical lines and a grainy texture to the picture. This will make the family portrait look as if it had been shot with an old camera. If you want to add horizontal lines instead of vertical ones, set Grain Type to Horizontal in the Grain dialog box.

- Select [Enhance]-[Adjust Color]-[Hue/Saturation] from the menu bar. In the Hue/Saturation dialog box, set Edit to Master, Hue to -20, Saturation to -50, and Lightness to 0. Click OK. This will make the colors look faded.
- Select [Window]-[Effects] from the menu bar. When the Effects palette appears, double-click on the Vertical Color Fade effect. The colors in the family portrait will fade toward the top. You can make the color fade across a pic¬ture by selecting the Horizontal Color Fade icon in the Effects palette.
- Open another image. This image must be created by scanning the hair and dust particles placed on a scan¬ner.
- Press Ctrl + A to select the entire image and then press Ctrl + C to copy it.
- Return to the family portrait and press Ctrl + V to paste the dust copy onto it.
- Press and expand the dust image to fit the size of the picture. Press Enter or double-click inside the image when you are done.
- In the Layers palette, change the Blending Mode of Layer 1 to Multiply. This will allow the family portrait to show through the dust copy.