Taking pictures in subzero temperatures is hard, but getting a shot with just the right amount of snowfall is even more difficult. You need perseverance and luck to get those kinds of shots. In this tutorial, you will make a picture of snow-capped trees and mountains even more perfect by adding a snowfall with the Add Noise filter.
- Open an image.
- Click the Create A New Layer icon in the Layers palette to create a new layer for the snow effect.
- Select the Rectangular Marquee Tool from the toolbox. Make the selection.
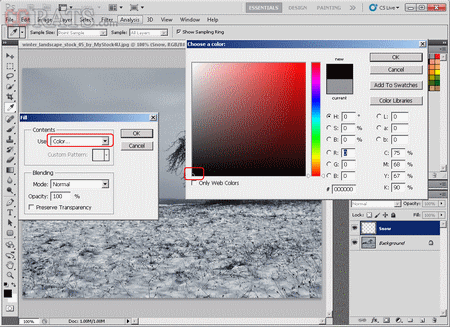
- Click on the Set Background Color icon in the toolbox and set the back¬ground color to black. Select [Edit]-[Fill] from the menu bar. In the Fill dialog box, set Use to Background Color. Click OK to fill the selection with black.

- Select [Filter]-[Noise]-[Add Noise] from the menu bar. In the Add Noise dialog box, set Amount to 40% and Distribution to Gaussian, and click the Monochromatic checkbox to create the effect in black and white. Click OK. The white noise added to the picture looks like falling snow. You can increase the volume of snow by increasing the Amount in the Add Noise dialog box. Do not apply too much because it will look unnatural.
- Select [Image]-[Transform]-[Free Transform] from the menu bar. A bounding box will appear around the snowflakes. Click and drag the corner handles of the bounding box so that its height fits the image’s height, but its width is slightly shorter. Press Enter to apply the changes. Adjusting the height of the selection elongates the snowflakes which would appear round otherwise.
- Select [Edit]-[Define Pattern] from the menu bar to save the snowflakes as a pattern. In the Pattern Name dialog box, type in Snow for Name. Click OK. You should save a pattern if you intend to apply it repeatedly.
- Press Ctrl + D to deselect the selection. Select [Edit]-[Fill] from the menu bar. In the Fill dialog box, set Use to Pattern. Click the Custom Pattern icon to open the Pattern Picker. Choose the Snow pattern.
- Click OK to apply the snow pattern to the entire image.
- In the Layers palette, set the Blending Mode to Screen to let the background image show through.
CREATING SNOW USING THE EFFECTS PALETTE
Although it is easier to create snow using the Effects palette, you cannot adjust the shape or amount of snow with this method. To try it out, select [Window]-[Effects] from the menu bar to open the Effects palette. Then select Blizzard and click [Apply].
Further Readings: