You can create a countdown clock for your website through a feature called Countdown Clock in your cPanel.
To create a countdown clock for your website, follow the instructions below:
Procedure:
1. On the homepage of your cPanel, click the CGI Center icon under Software/Services.

2. Click on the Countdown link.

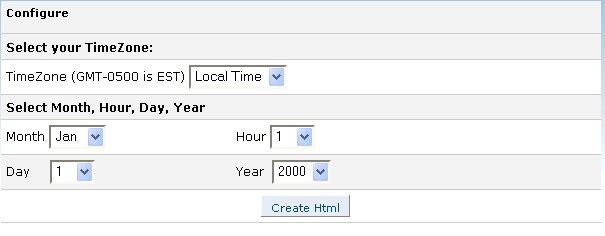
3. Under Select your TimeZone, select a time zone from the drop down menu. The timezone can be set to your local time or Greenwich Mean Time (GMT).

4. Under Select Month, Hour, Day, Year, select the month from the drop down menu.

5. Under Select Month, Hour, Day, Year, select the hour from the drop down menu.

6. Under Select Month, Hour, Day, Year, select the day from the drop down menu.

7. Under Select Month, Hour, Day, Year, select the year from the drop down menu.

8. Click on the Create Html button.

9. Copy the Html code beginning with <applet and ending with </applet>. Paste the Html code into the place where you want the countdown clock to appear on your website. You can do this with a code editor such as textpad, notepad and etc.

If you follow the instructions above, you will be able to create a count down clock for your website through cPanel.