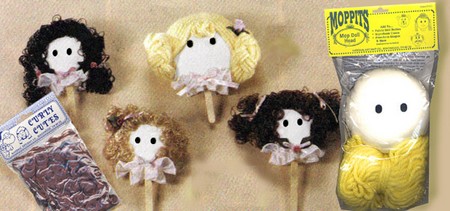
You can recycle your mops by changing them into dolls. An old string mop can be converted into a decorative doll for your children or friends. These dolls can be made easily and will cost very little money to make. The head of the mop can be fashioned to form the head, legs, arms and body. You can make clothes or decorate the body to fit and gift idea or occasion As for the face you can sew on a face or leave it blank. A blank face is more traditional.
Things You’ll Need:
- String mop
- Rit dye
- Scissors
- Yarn
- Ruler
- Doll outfits
- Needle
- Thread
Step 1
Take the head of the mop off the handle. All metal pieces should be removed as well. You will need to disinfect the mop and allow it to air dry completely. Decide what color you want to dye the strings of the mop. You can use Rit dye to color your doll. You will need to follow the directions on the box. The dye also needs to set and dry before going on to the next step.
Step 2
You will need to pick and cut 3-5 strings from the middle of the mop. These will be used to the the head, arms and legs. If your doll will be covered and you decide not to make legs, then you can cut three stands off the mop instead. Make sure the strings are removed from a part of the mop that it won’t be noticed. Also, if you decided to dye the doll, you can opt to use yarn instead of removing the mop strings.
Step 3
Lay the mop on a flat surface. Make sure all the strings are laying even. Measure 1-2 inches from the top of the strings. This is the head of your new doll. You should adjust the size of the head to match up with the size of the doll you want. Take a piece of the colored yarn or cut mop string and secure it around the place that you measure. Secure the string in a knot at the back of the knot and pull it tight. Keep the strings tight by tying up to three nots to make sure it’s secure. These are the head and neck portion of the doll. Remove any excess string.
Step 4
Now create the arms. Do this by separating sections of string on both the left and right sides of the doll.Leave enough space in the middle of the mop for the body and leg portions. From the end of each arm measure ½ an inch and then tie a string aroung the section. These are your doll’s hands.Remove any excess strings. Cut the edges of the bundle evenly to make the hands the same size.
Step 5
Start at the neck are and measure a few inches down. Tie the area securely. This is the waist of your doll. You can now create the legs for the doll in using the same method you used to create the two arms. Making legs are optional. You can always leave the strings as they are. This makes it appear to have a skirt on.
Step 6
You can now dress your doll with clothing that you made or purchases. Sew eyes and a mouth on the face of your new doll. You can also add personality by sewing colored yarn into the head of the doll. Leave the hair long so it’s easy to pratice learning to braid hair. Enjoy your new doll.
