How to Install Siteframe through Cpanel
By Justin Belden on Dec 29, 2009 with Comments 0
Siteframe is a free content management system that was developed for community based websites. Siteframe allows a community group to share their pictures, stories, create blogs and enroll in certain activities. Users are not required to have any programming language to use Siteframe content management system.
You can change the default Siteframe template by editing the provided files. Once you have edited the file, you should save it. When you update it to a new version, all the changes you made in the template files will be overwritten. For example, you copy the index.tpl to myindex.tpl and make some changes to it. After that, you should add the index.tpl = myindex.tpl to the custom.inin file. The custom.ini must be located in the same directory of template.ini.
You can also integrate the FCK editor to your Siteframe site. To install the FCK editor on the Siteframe site, you should download it at fckeditor.net. However, the FCK editor cannot work with comments in the Mozilla Firefox browser.
WidgEditor is another text editor that can be integrated into your Siteframe site. You can download widgEditor at themaininblue.com/experiment/widgEditor/. WidgEditor is not compatible with Internet Explorer. Many people pointed out that text entry is slow in Internet Explorer when using WidgEditor.
If you want to install Siteframe through cPanel, follow the instructions below:
Procedure:
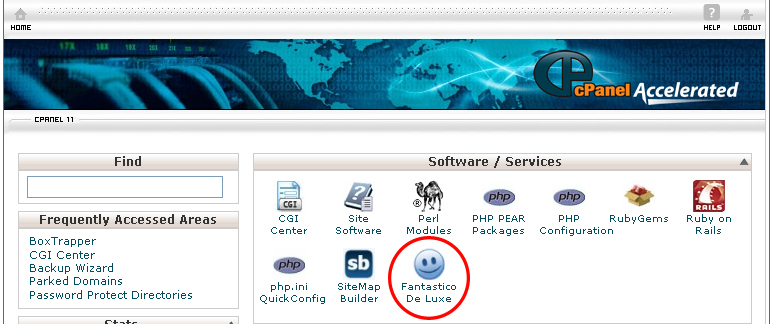
- On the homepage of your cPanel, click on the Fantastico icon. This will take you to the home page of Fantastico.
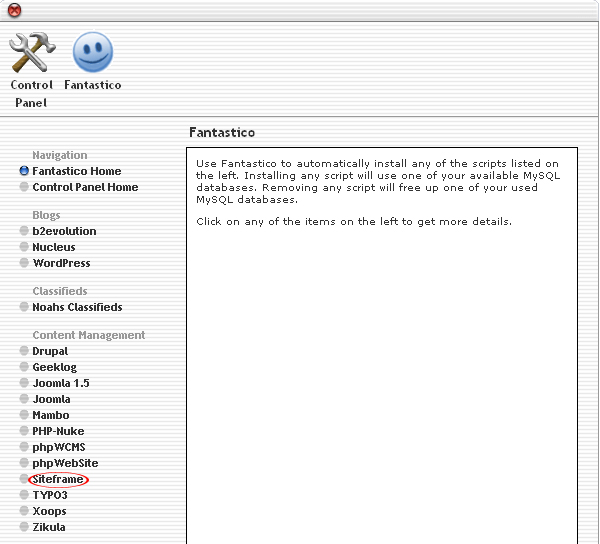
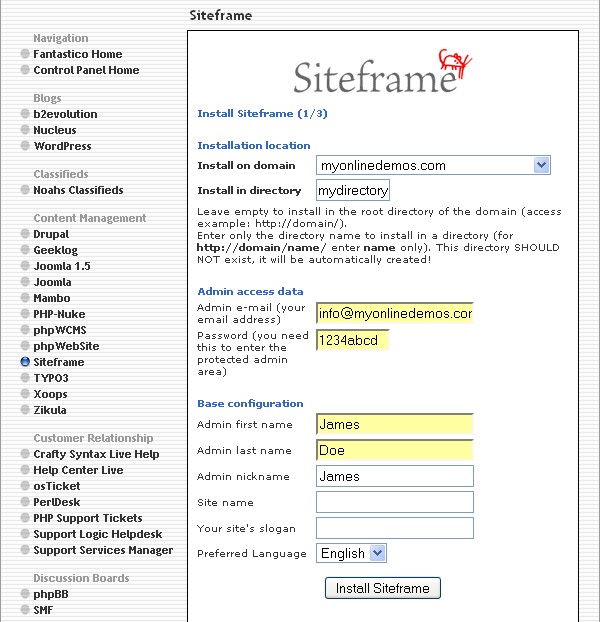
- Click on Siteframe in the Content Management section on the left Navigation bar.
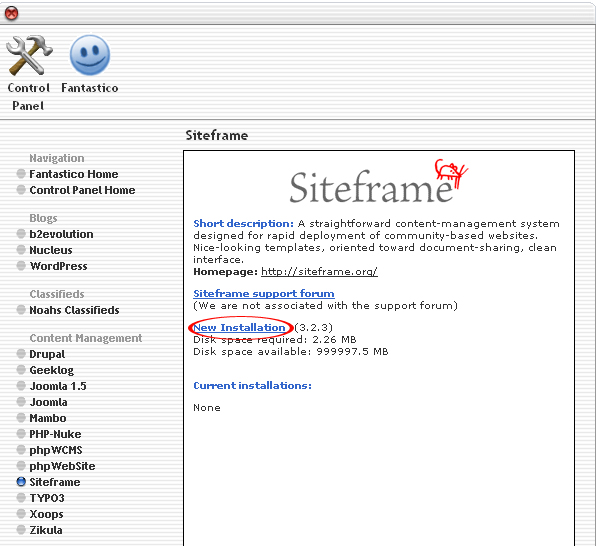
- Click on New Installation.
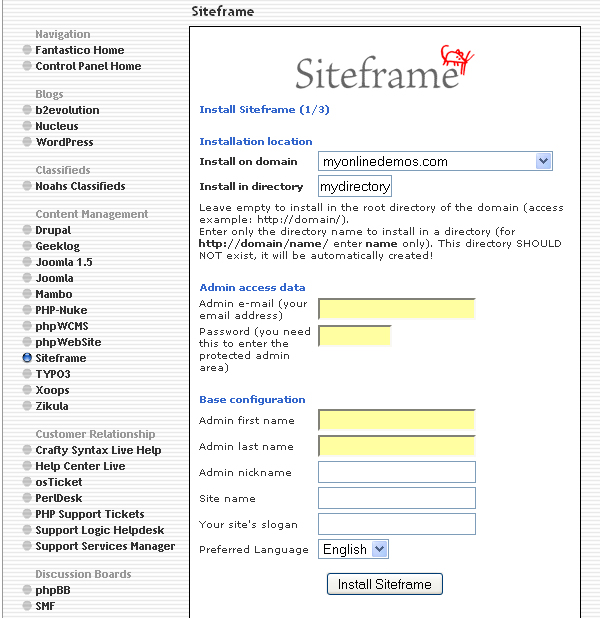
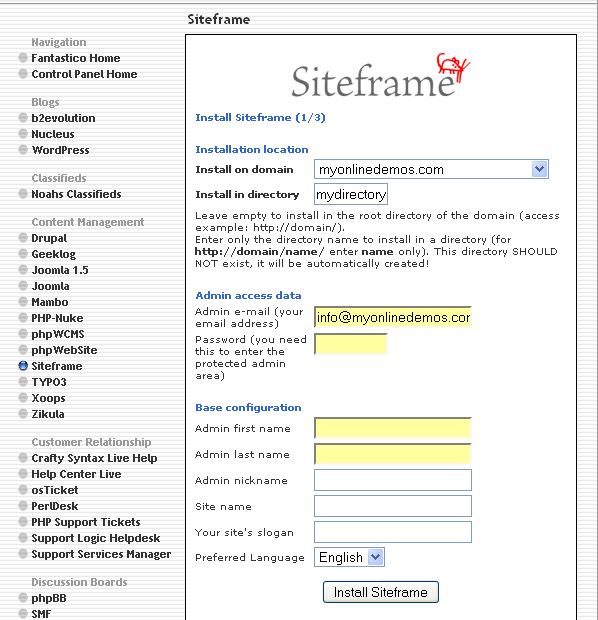
- Select the domain on which you want to install Siteframe from the Install on domain drop down menu.
- If you want to install Siteframe in the root directory of the domain, leave the Install in directory text box empty. If you want to install Siteframe in a directory, enter the directory name. This directory should not be existed. It will be automatically created.
- Enter the email address in the Admin e-mail text box. All Siteframe notifications will be sent to this email address.
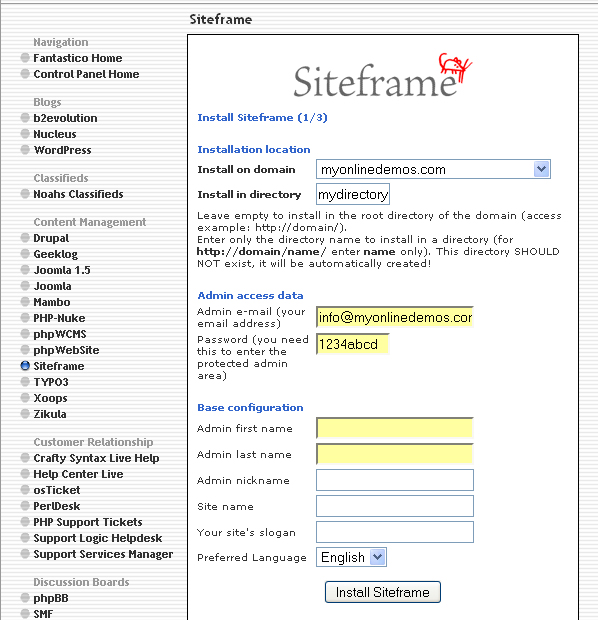
- Enter a password in the Password text box. You need this to enter the Siteframe administration area.
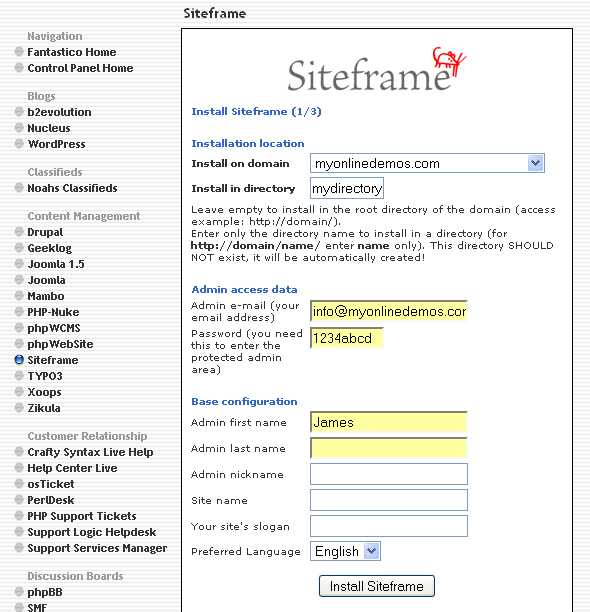
- Enter your first name in the Admin first name text box.
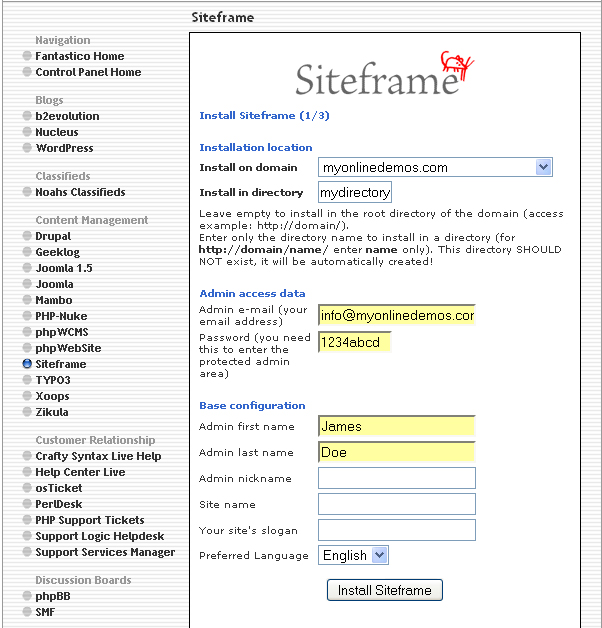
- Enter your last name in the Admin last name text box.
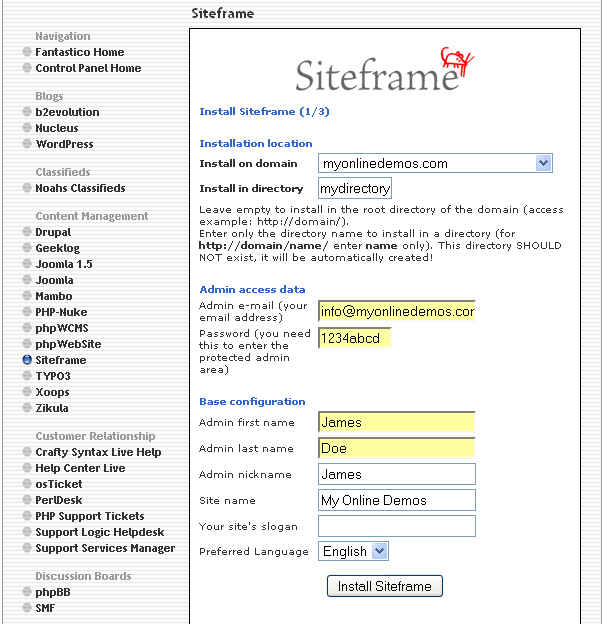
- Enter your nick name in the Admin nickname text box.
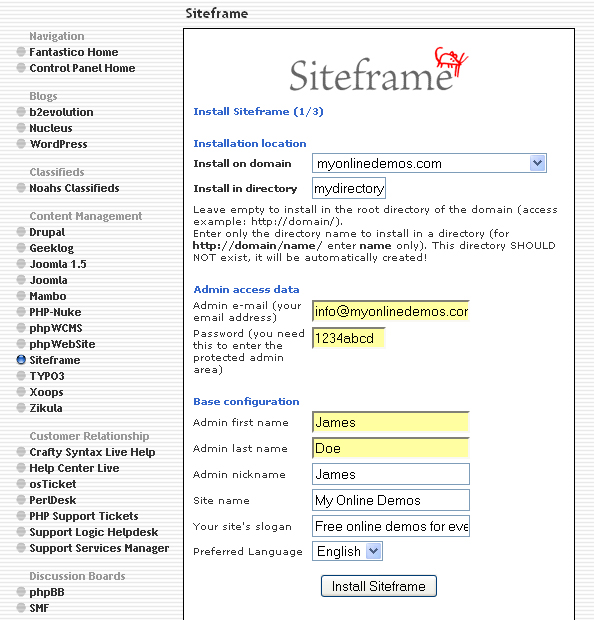
- Enter a name for your website in the Site name text box.
- Enter a slogan for the website in the Your site’s slogan textbox.
- Select your preferred language from the Preferred Language drop down menu. By default, it is set to the language on your cpanel interface.
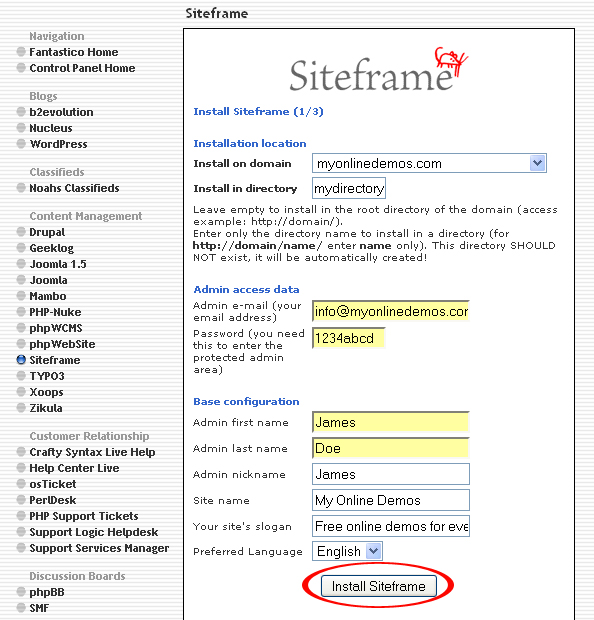
- When you are done, click the Install Siteframe button.
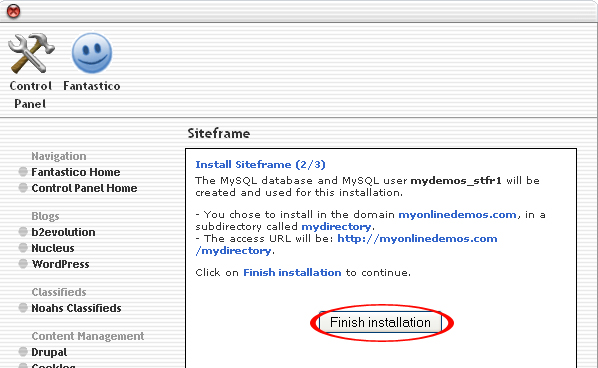
- Click the Finish Installation button.
- The Siteframe is now successfully installed.
By following the guidelines above, you will be able to install Siteframe on your website.
Filed Under: Computers & Technology
About the Author: Justin Belden is a freelance web & graphic designer with over 15 years' experience. He is also an Avid member of the Design/Development community and a Serial Blogger who loves to help people by sharing interesting and informative tips and trick related to computer and technology.
