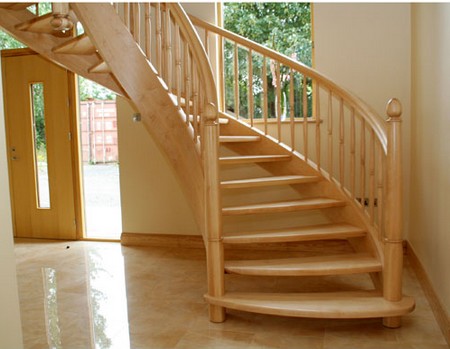
Methods of stair construction vary greatly, and consequently repair procedures differ. So before undertaking repair operations, study your stairway to determine how it has been built.
There are two major residential stairway types: the straight run and the platform. Apart from its treads, the straight-run stairway has no level spot on the run as the stairs move from floor to floor. By contrast, the platform stairway has a level spot, called a landing, at which the stairs stop momentarily before moving upward either straight or at an angle to the initial run.
Carefully look over your stairs to determine what type of stringers, railings, treads, and risers your stair system uses.
FIXING CREAKY STAIRS
Creaking stairs are caused by loose tread and riser joints. There joints are of two types: butt and groove-and-rabbet. Before repairing, find out what type of joint your staircase uses. First, pry off any cove molding under the nosing. Then probe at the joint between the riser and tread with a thin knife. If the tool easily penetrates upward, the joint is groove-and-rabbet. If not, the joint is butted. How you eliminate the creaks will depend on which type you have.
To eliminate creaks from butt-joint stairs, stand on the tread, pressing it down on the riser. Then hammer two or more 8d finishing nails into the tread at an angle to each other, making sure the nails go into the riser. Do this for all loose stairs. Finally, set the nails, add wood putty up to the surface, replace the cove molding, and finish.
To de-creak groove-and-rabbet-joint stairs, drive wood wedges between the groove and rabbet. Before cutting off the ends, make sure the wedges fit snugly. Then renail the molding without using the original nail holes. Set the nails, fill the original holes, and fill the new nail holes to match. If the underside of the soffit or stairs is open, glue and screw blocks into the angle between the riser and tread, making sure the block is firm in the joint. If there already are some blocks present, tighten the screws and, if necessary, add more screws.
You can repair a damaged tread nose by gluing the split part back into place, then reinforcing it with a small wood screw or finish nail through the split. Finally, set the nail or countersink the screw, fill, and refinish.
Before attempting to replace the tread, find out what type of joint the tread makes with any wall stringer. If the tread butts against a plain stringer, a knife blade will penetrate downward at the tread and stringer joint. If the stringer is cut-out, the knife blade will penetrate horizontally between the tread and stringer.
REPLACE TREADS
To replace a tread butting against a plain stringer, first pry off any quarter-round molding at the joint between the tread and the wall stringers. Then pry off the cove molding under the tread nosing, if any. Loosen the baluster resting on the outer end of the tread, if there is one. If the baluster is nailed to the tread, knock it loose with a rubber or wooden mallet. If dovetailed, saw it loose with a crosscut saw. Then remove the broken tread by hammering up lightly against the underside of the nosing.
Next, pull all nails left in the carriage and nailing blocks. Make a new tread, using the broken tread as a model. Fit the new tread in place, planing it to fit if necessary. Then glue the tread to any nailing blocks or supports. Face nail the tread to the carriage and nailing blocks with finishing nails set 2 inches apart. Replace the baluster, toenailing it to the new tread with two 6d finishing nails.
Replace the molding at the joint between the tread and wall stringers with either new or reconditioned old molding. Replace the cove molding under the tread nosing. Finally, set all nails, fill holes, and refinish.
To replace the tread on cut-out stringers, first cut through one wall stringer with a back saw at the point marked A in Fig. 50-4, above the joint between the back of the broken tread and the riser resting on it. Then cut just below the nosing of the broken tread (B). Pry up the cut riser piece with a chisel along line C. Now pry the cut stringer piece away from the wall with a ripping bar.
Next, repeat the above steps on the opposite stringer, if required. Loosen the baluster resting on the outer end of the tread, if there is one. If the baluster is nailed to the tread, knock it loose with a rubber or wooden mallet. If dovetailed, saw it loose with a crosscut saw. Then remove the broken tread by hammering up lightly against the underside of the nosing.
Next, pull all nails left in the carriages and nailing blocks. Make a new tread, using the broken tread as a model. Fit the new tread in place, planning it to fit if necessary. Then glue the tread to any nailing blocks or supports. Face nail the tread to the carriages and nailing blocks with finishing nails set 2 inches apart. Replace the baluster, toenailing it to the new tread with two 6d finishing nails.
Replace the molding at the joint between the tread and wall stringers with either new or reconditioned old molding. Replace the cut-out pieces of the wall stringer, being careful to nail finishing nails into the studs. Finally, set all nails, fill holes, and refinish.

